
In this article I will try to cover some advantages and disadvantages of the shooting head over the WF line, and I will thoroughly describe the way you can configure a good shooting head system for your rod.

The more than Adequate Shooting Head DIY, a guide to building your own shooting heads for fly fishing
More and more salt-water fly fishers seem to choose the shooting head setup as their preferred setup, when fishing from the coast. Steelheaders also use shoting head setups and even salmon fishers, using two hand rods will in many cases prefer a shooting head.
In Denmark, where saltwater fishing for sea trout is one of the most common types of fly fishing, the shooting head has become very widespread in the last few years.
In this article I will try to cover some advantages and disadvantages of the shooting head over the WF line, and I will thoroughly describe the way you can configure a good shooting head system for your rod. The article will teach you how to calculate, make and trim a shooting head. It will also tell you how to cast it - just on the introductory level.
The construction
The shooting head is a simple construction, where a piece of fly line is attached to a thin shooting (or running) line. You cast the line in the normal manner and the heavier shooting head will pull the lighter running line and typically enable a longer cast with less effort.

1st chapter - Cast further
In which you learn why it might be convenient to own a shooting head
The one main advantage of the shooting head is longer casting distance with smaller or the same effort. This is the single most important reason why people will choose a shooting head over any other type of line. There are other advantages, but true, in most cases you do cast longer with a shooting head setup.
The distance is achieved through a simple redistribution of weight; more in front and less in the back. The shooting head is typically shorter and denser - even heavier - than the belly of a WF line, and the running line is thinner and lighter and at times smoother than the thin part of a WF line. The shooting head will give you these advantages:
- it will cast longer with the same effort because of the light, often low friction running line
- it will facilitate line speed gain and power in the cast, through concentration of the casting weight in the front end of the line
- it has a tendency to cut well through the wind, which is very relevant for the saltwater fisher.
- it will take fewer blind casts to get line speed ("get the rod loaded"), eliminating the need to work out line bit by bit.
- it can be configured to cast quite heavy flies - a benefit to the saltwater or pike fisher
2nd chapter - Backsides
Where you learn why a shooting head might not be the best thing since sliced bread anyway
The use of a shooting head is not only a blessing. There are disadvantages too. Among these you will find:
- lack of precision. The strength lies in power and distance, not delicacy.
- poor short line abilities. There is a minimum length of line, which has to be out of the top eye before you can cast well.
- poor turnover of leader and fly. The heads are often constructed with short front and back tapers and rely on power or fly weight to turn over properly.
- mending can be impossible because of the light running line being unable to move the heavy head
- poor roll casting abilities for the same reasons as above.
- noisy landing. The line can splash on the landing - especially with sinking lines.
It's important to notice that shooting heads are very different. Some are half double taper lines with almost no taper, while others are carefully constructed with roll, spey and underhand casts in mind, and often as good or better with these casts than a simple WF line.
3rd chapter - Make your own
In which you learn that it's a good idea to DIY
You can buy shooting heads from many fly line vendors. In spite of being shorter than a full line, these are not less expensive. They will usually cost the same as a complete WF or DT line. And they are nice. They are often finished with loops in both ends and many of them will either come with a running line or be spliced directly to one.
But there are good reasons to make your own, especially if you are just starting out in shooting heads. You can both save money (a lot actually) and get a line that is trimmed precisely to fit your rod.
The most common starting point is an inexpensive DT line. You can buy any brand you like, and it's not necessarily a bad choice to take a second rate line. These might differ in the quality of the coating and the precision of the tapers compared to the brand names, but that doesn't matter much. The reason for this is the fact that the shooting head will not pass through the top eye at the peak of each cast - it will be outside. The taper is less important because there can be good reasons to trim or even remove the taper. So feel comfortable picking up a second rate line or a no name offer.

Getting down to the bottom in deep currents for fish like cod and flounder means fishing with heavy lines - sometimes extremely heavy.
4th chapter - Killer lines
In which you learn that some shooting heads sink fast - and just how fast
In many cases you want to make a sinking shooting head - a very fast sinking one. That calls for special types of lines like Deep Water Express or Lead Core. Some of the fast sinking regular fly lines will do too, but will rarely sink as fast as the dedicated deep water lines.
Choosing a line weight might not be a big issue here because many of these lines don't come in regular line weights. They either come in one-size-fits-all or are measured in grains. Typical weights are between 200 and 850 grains with the larger number being the heavier line - very heavy actually.
You will find fast sinking lines from all the major manufacturers of fly lines, but many of them are expensive special purpose lines, which you'd not want to cut before they are very worn.
Deciding how much of the special deep water lines you need can be somewhat a tedious task. The best measure is not length but weight - and here I mean weight in grams or ounces - not in AFTM classes.
In the table below you can see the typical weight of the tapered part of a WF line for different AFTM classes. Those weights can serve as a guideline when you design your shooting head.
Some of the very fast sinking shooting heads do not comply with any kind of weight rules, but are just very heavy... like very! These lines are oftentimes not cast in the normal way with blind casts, but typically fed out and simply let sink, like from a boat, a kayak or a float tube. The aim is to reach the bottom directly under you, and not to reach a distant target.
5th chapter - Line weight considerations
Where you learn to determine the proper line weight - and make the first cut
Your first decision in this venture is choosing a line weight. Let's assume you want to make a head for a 7-weight rod. Don't pick up a 7-weight line! Maybe not even an 8 weight. You'd probably always want to go one or two classes over the line weight of the rod. If you don't, you wind up with a very long shooting head. For your first head I'd suggest that you go two weights over the rod weight.
Bring home the line, and check the length and the tapers. Cheap DT lines often have varying lengths and different tapers in each end. The line should be somewhere between 24 and 27 meters (72 and 81 feet). You will need less than half of this, so bring out your scissors and cut the line in half! If there's a difference in tapers, choose the one with the most blunt taper and store the other for later use.
You can save some later work by stringing the uncut line on the rod and casting it on a lawn. Find the spot where the line casts well and loads the rod properly. With this done, you cut the line where you are holding it, which ideally should be the proper shooting head length plus a rod length. From this point there will be less trimming needed than from half a line. The typical length of the finished head will be somewhere between 9 and 12 meters (27 and 36 feet), so if the piece you are about to cut is shorter than 9 meters, you might want to reconsider.
When calculating the weight of a shooting head, you can use this number as a guide line and increase the weight for a given AFTM class. The right side of the table shows suggestions for this shooting head weight. On top of that I personally prefer even more weight, and for demanding conditions like long casts under windy conditions I go two classes above the AFTM class. Each rod has its own performance, so you will need to test and adjust individually under all circumstances.
| AFTM Weight of WF 30' belly | Recommended shooting head weight for single hand rods | ||||
| Grains | Oz. | Grams | Oz. | Grams | |
| 3-Weight | 100 | 0.23 | 6.5 | 0.26 - 0.30 | 7.5 - 9 |
| 4-Weight | 120 | 0.27 | 7.8 | 0.30 - 0.38 | 8.5 - 11 |
| 5-Weight | 140 | 0.35 | 9.1 | 0.35 - 0.42 | 10 - 12 |
| 6-Weight | 160 | 0.37 | 10.4 | 0.42 - 0.50 | 12 - 14 |
| 7-Weight | 185 | 0.42 | 12.0 | 0.50 - 0.56 | 14 - 16 |
| 8-Weight | 210 | 0.48 | 13.6 | 0.56 - 0.63 | 16 - 18 |
| 9-Weight | 240 | 0.55 | 15.6 | 0.63 - 0.74 | 18 - 21 |
| 10-Weight | 280 | 0.64 | 18.1 | 0.71 - 0.85 | 20 - 24 |
Please notice that the above recommendations are just guidelines. I personally often cut my shooting heads slightly heavier - in the high end of what this table recommends, and some source recommend even heavier heads, particularly for rods in the 9-12 wt. range. And if you are cutting heads for two hand rods, both length and weight needs to be increased significantly compared to the above table.

6th chapter - Using weight as a measure
Where you learn that weighing the line might sometimes be necessary - or just a good idea
In stead of length you can use weight as guidance when cutting the line. This will typically be convenient if you have already made several shooting heads for a specific rod or if you have a friend who has.
You will need an accurate scale, which can weigh with a precision within 1 gram or 0.03 ounces (or 15 grains in fly line terminology). Weigh an existing head for reference, and get out the line you want to cut. Wind it up in relatively tight curls - 10-15 centimeters or 4-6 inches in diameter - and place it on the scale. Note the weight. If it's a DT line you can now calculate the weight per length - i.e. per meter or per foot. With that and the reference in hand you can easily calculate the length of the head.
If your usual shooting head weighs 22 grams (3/4 of an ounce), and your 27 meter (81 feet) DT line weighs 67 grams (2.4 ounces), you need 8.8 meters (26.5 foot) of the DT line to make up a head of a similar weight. In that case I'd cut 9.5 meters or 28.5 feet of the DT line and use the trimming process described below to get the right performance.
If you are cutting a WF line, weigh the head alone, leaving the running line on the table, and compare to your reference. If it's too heavy, remove a coil and weigh again, and repeat until you have the right weight. Add one or two coils and cut the line. It's now ready for the trimming process.
If it's too light you need to go up a line class. You do not want any of the running line as part of the shooting head as it adds too little weight and a lot of length to the head.
7th chapter - Running line considerations
Where you learn the pluses and minuses of different running line types
The running or shooting line basically comes in some main types:
- plain, thin level (L) or double taper (DT) fly lines
- plain or specialized monofilament lines
- braided lines
- coated monofilament lines
Selecting one can be difficult. I have come to love the braided types, but have also used the fly line types with great joy. I'm not so pleased with the monofilament ones, but many other anglers love their superior casting abilities and low friction. You can sum up the advantages and disadvantages of the running lines like this:
Fly lines (Many brands)
Pro: floats, handles beautifully, good friction turns over shooting head, knots untangle easily
Con: high weight, fairly high friction, stiffness limits casting lengths, expensive
Monofilament (Flat Beam, Amnesia)
Pro: low friction gives extremely long casts, mostly inexpensive
Con: most brands sink, difficult to handle, low friction yields poor shooting head turn over, kinks easily with tight knots as a result.
Braided (HT. Airflo, Scierra and similar brands)
Pro: good friction turns over shooting head, handles well, knots untangle easily
Con: sinks, curls and kinks if not maintained, can be noisy, can wear fingers, wears with time
Coated monofilament
Pro: good friction turns over shooting head, handles well, floats
Con: kinks easily, can be fairly stiff

My recommendation is to start with the fly line type if you can afford it. It's the easiest line to use out of the box. Second I'd recommend the braided line, which will give the best of both worlds. Wait with the monofilament, which in my experience will work best for the more skilled shooting head caster.
You will need 20-30 meters (60-90') of running line. Here's a full article about shooting lines.
If you have no experience casting a shooting head, now is a good time to use a telephone! Call a friend or fellow fisher who has some experience with shooting heads, and have him or her come over for a cup of mocca and some lawn casting.
You will have a hard time adjusting the setup if you have no experience with this type of casting at all, and the risk of trimming a head too short cannot be ignored.
9th chapter - First cut
Where you are warned that the first cut might be the last
It's not nice to cut a fly line in two. Especially if you - contrary to my advice - have bought an expensive brand name fly line. One wrong cut and what might have been a great shooting head - maybe even two - is ruined and ready for the trash bin.
So check it a couple of times and measure just once more before applying the scissors. Should you wind up with a line that has been cut too short and can't load your favorite rod... well, save that line. It will fit a lighter rod and make a maybe less-than-perfect, but serviceable shooting head.
10th chapter - When all else fails
In which we learn that everything can be overdone
So now it's time to find that lawn. A parking lot can do, but it's hard on the line. Water is also OK, but no necessary. A newly cut lawn with plenty space is perfect.
Simply string the head through the rod eyes, tapered end out. No reel necessary. Leave 9-10 meters or about 30' out of the tip top, hold the butt end in your hand and start blind casting.
If the shooting head doesn't load the rod in the first few casts, let out a couple of feet of line and blind cast again. If it still doesn't load, you let out even more line. When the rod overloads, you can start the process and cut into the line, removing a bit to get closer to the finished length and weight as described in the next chapter.
If there is no overload, and the whole half DT line minus a rod length gets out without loading the rod properly, you have a problem. This means that your potential shooting head is now more than 12-13 meters (36') long, which will typically lead to problems with low back and front casts and difficulties keeping the line in the air - unless you are a very accomplished caster.
You will need to go up one or maybe even two line classes as a starting point.
Before going to the extreme of buying and cutting into one more line, have a friend test the setup or try it on a lighter rod - just to be sure that it's the line that's too light and not your casting that sucks. It's unlikely of course, but I'm just sayin' so...
11th chapter - Casting tests
In which we prepare the newly cut head for the first step in the trimming process
The best way to trim the shooting head is by casting it. Mount a leader on the tapered end - with a nail knot, a loose loop, or by splicing a permanent eye on the line.
Put a braided sleeve type loop on the back end of the shooting head and a loop on the front end of your running line - no matter what type of connection you want to end up with. During the tests you will probably need to take the assembly apart several times.
Fit the whole thing on a reel. It will typically take up a bit less space than a WF or DT line for your rod.
Now you need to go back on the lawn. Water can do too, but is not necessary.
Bring a pair of scissors, some extra braided loops and a couple of fake flies - bright yarn or pipe cleaners will do fine.
String your line assembly through the eyes and strip out most of the shooting head. Hold the lower end - the connection between running line and shooting head - and make a few overhand blind casts. Don't shoot line.
The rod should load well and preferably overload a bit. This is a good sign. Remember the head is still too long and too heavy. Take in a foot or so and blind cast again. It should still overload. Keep on taking in line and blind casting until the rod loads perfectly to your liking.
Now mark the spot where the line passes through the top eye and draw out the whole shooting head.

12th chapter - Action! Cut!
In which we learn that iteration can lead to perfection
The mark indicates where the line loads the rod well. We will not cut here immediately for two reasons:
1) we don't want to cut the line too short - there's no splicing it back together again
2) we want the head just a bit on the heavy side in order to really load the rod
In other words: cut the line 1.5 meters or 4-5' behind the mark, leaving the head just a bit longer.
Put on the loop and assemble the whole thing again. Repeat the casting steps.
This time the line should cast well at some point where the connection between the shooting head and running line is in front of your hand somewhere along the rod, but not out of the top eye.
If this is the case, bring the connection out, and cut off one or two more feet or 30-60 centimeters. Connect again and test again.
Repeating the testing and cutting with still smaller trims should eventually lead to this result: at some point the connection will pass a foot or so beyond the top eye before loading the rod so well that you can hardly resist shooting line. When this happens, you should stop cutting and start the real casting. Do some practicing with a couple of blind casts, double hauls and the works, and shoot line.
The trimming process is a question of iteration - cast, cut, cast, cut and so on, until the head casts well.
Your shooting head should now ideally be somewhere between 9 and 10 meters (27' and 30') and lead the rod perfectly with a foot or two of running line outside the tip top.
Chapter 14 and 15 tells you a bit about doing the finishing touches, but take the head fishing first if you're a newcomer.
13th chapter - One point casting
In which we learn how to cast a shooting head when fishing
Casting a shooting head is different from casting a WF line. It will typically only cast well at one point with a certain amount of line out of the top eye. That point should ideally be when the head is 1 meter or 3 feet out of the top eye. This allows for a double haul, but will not leave too much of the light shooting line in the air, causing lack of control in the cast.
You work out line like you would in any cast until you reach the link between the head and the shooting line. Then you make one additional blind cast and let go. The rod should be well loaded - maybe even a little too much, and the head should trail a fair length of shooting line behind it, turn over the fly and land as straight as a normal WF line. My idea of an ideal cast is a roll cast to stretch the shooting head on the surface and a single back cast to load the rod. You can see it animated below.
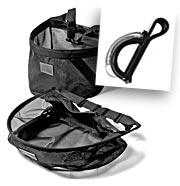
Line basket or clip (insert) can help casting under difficult circumstances.
Line basket or clip
Many anglers connect shooting heads and line baskets, but there is not necessarily any connection between the two. Having a line basket can be convenient - especially while fishing from rocks or in the surf, where tangles can be a severe problem. Some use a line basket in running water too to avoid the line dragging downstream. The sinking nature of many shooting lines - especially the monofilament ones - can also be a good argument for investing in a basket. But consider trying without.
The basket is one extra accessory to haul along, and it does limit your stripping patterns, as you have to strip into the basket. An alternative is a clip, which holds the line in large coils. Take a couple of strips and tug the coil into the clip. When you cast it should release itself as tension draws it.
Read much more about baskets, buckets and trays here.
14th chapter - Backwards or forwards
In which we learn that the head has a front and a back end - and that they're different
Your next move is to select which end of the line you want to attach the leader. And yes, there is actually a choice. If you want a line that has more normal casting and turnover abilities, you should choose the tapered end as the front end, but reversing the line and choosing the blunt end will yield you a line that can have some awesome wind breaking abilities. Casting such a line might not be a charm, but when you have a heavy wind against you, you will be pleased with its performance.
If you want to put loops on both ends of your line you can always reverse it when needed. In this case you make an initial loop on the tapered end, and attach a leader to that. If you prefer spliced leader connections, nail knots or similar you attach your leader directly to the tapered end. No matter what you will probably want to choose the tapered end for the leader - at least for you first head.
15th chapter - Finishing up
Where we learn different ways of doing the final cosmetics on the setup
When the proper length has been reached, you will need water to get onward. Rig the rod for fishing with a proper leader, fly and the works, and go to the water to experience the handling and real casting while standing in water. Experiment with lifting the line off the water, roll casts and overhead casts. You will probably experience that the whole thing works perfectly, but you can also be surprised by a line that keeps diving, which means that the head might still be a bit long. Trim carefully and keep experimenting.
When the whole thing seems to work, make a really nice connection between the shooting head and running line. This point will go through the eyes many times during a day, and should be as slim and smooth as possible.
I personally prefer the spliced eyes on both ends of the shooting head, which enables me to change both leader and the whole head without tying knots. Others prefer even smoother splices like sown or glued ones covered with Aqua Seal or a similar compound and a good old fashioned nail knot, which indeed transfers power beautifully to the leader and the fly.
16th chapter - Further trimming the head
In which we learn that the process might not be finished yet
There are several things you can do to get a better - or rather, different - performance from your shooting head. Many fishers prefer cutting off a part of the front taper in order to get a stiffer front part, which will better turn over on power casts and better penetrate the wind. Look at the taper. Many fly lines have a tapered section and then a long, thin tip. This tip doesn't do much work in the cast, and might as well be removed. Cut the line about 15-20 centimeters (½') from where the real taper starts, and mount the leader here. The trimmed part will be 30-50 centimeters (1-2') of thin line, and the little weight removed will not effect the performance of the head.
A radical piece of advice regarding the taper is to totally reverse the shooting head as mentioned above. This will leave you with a head with no front taper, which does not give the most beautiful casts, but will enable the line to cut through even rough winds. If you have attached the head with loops it is worth the bit of trouble to try this configuration.
Once you have a head you like, measure and weigh it and in the future you can easily cut new heads by simply aiming for the same length and weight. The weight is the most important factor, and different lines will need slightly different lengths to get the same weight - especially if you very the density: floating, neutral, sinking. But as you work with and fish the heads, you will gain knowledge and confidence, and be able to do a new shooting head with no casting tests at all.
17th chapter - Casting a shooting head
Where we learn a few tricks to cast better with a shooting head setup
If you are used to casting with overhead casts, the use of a shooting head will not be strange to you. It responds a bit more aggressively and will probably gain a bit more line speed than your usual WF line, but that's the whole idea.
There is some advice you should heed:
- Roll cast the line to stretch the line on top of the water before the first back cast.
- Use the tension of the line on the water to load the rod for the first back cast.
- Use as few blind casts as possible - one will often do. Excessive blind casting does not give more distance.
- Shoot line when the head is just out of the top eye with only enough running line free to work the cast.
- Use a double haul to increase casting speed and length.

The above animation and the video below shows the most efficient way to cast a slow sinking or sinking shooting head. Strip a couple of times when the base of the head passes through the top eye. Make a roll cast to bring the shooting head to the surface. Let the head and a bit of running line pass through the top eye in the cast. As soon as the line touches the surface, make a single back cast and cast the shooting head and running line.
In some cases one or two blind casts will aide the cast, increasing speed and distance, but excessive blind casting will rarely brings anything good. Never work out too much shooting line. This will only add length to the casting part of the line, but no weight and bring nothing but trouble.
The efficiency can be highly improved with a double haul - in fact a shooting head cast is almost impossible to do without.
Notice how the cast is centered around the transition between the shooting head (red) and the running line (gray). This link will pass through the top eye under great stress several times in every cast. It has to be the sweet spot of the setup, and the head needs to cast well with just a bit of running line out of the top eye and still load the rod well with a meter or two (3-6') of the shooting head inside the top eye.
Video showing how to effectively cast a shooting head.
- Log in to post comments
