A simple tube fly concept or template that can be varied endlessly and is easy to tie using common materials
In connection with my recent article on tools for metal tubes, I of course tied some tube flies. Both in order to test the different tools and in order to shoot some photos.
A couple of these flies came out pretty good looking, and I decided to tie a bunch of flies using the concept, which was pretty simple, but resulted in some nice flies.
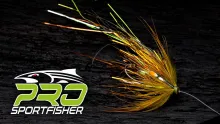
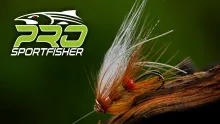
One of my experiments was a lightweight and discrete fly meant for salmon fishing in low and clear water. Another one was heavier and brighter and meant for salmon in deeper and more peaty water.
The latter became the Orange Guinea Fowl Stube, and the first one the Wood Duck Stube.


“Stube?” you may ask.
“What kind or word is that?”
Well ... Simple Tube, S-Tube, Stube ... That kind of word.


Bottle tubes
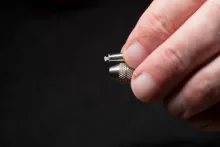
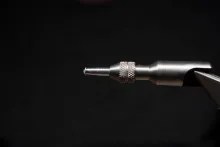
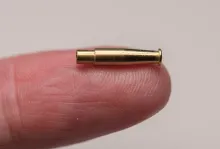
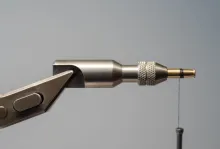
Since I was messing around with my Bidoz Bottle Tubes in brass and aluminum, that was what I tied on, and since I wanted some small flies, I selected the short version of the 4mm diameter tubes. These are 15mm long, and form the perfect base for some really compact flies. There are plenty of such bottle tubes available from many different manufacturers, and if you can't find metal bottles, this concept will work equally well on plastic tubes, just giving you much lighter flies - unless you add weight.
The aluminum Bidoz tube is very light, weighing only one third of a gram or just a bit more than a hundredth of an ounce. That is comparable to a hook, and even finished with materials, guiding tube and an actual hook, this fly hardly weighs more than an ordinary fly tied on a salmon hook.
The brass version on the other hand is significantly heavier, and weighs more than one gram or about 0.035 ounces. Once fully tied and finished, it’s a pretty heavy fly that can find deeper water even in fairly strong current.

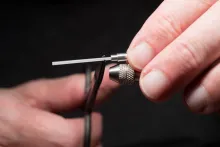
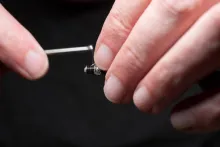
Melt a collar in one end of the lining |
Pull the lining through the bottle tube |
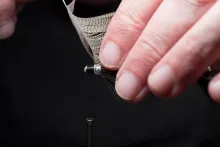
Trim the lining tube |

Melt a second collar |

This secures the lining tube |
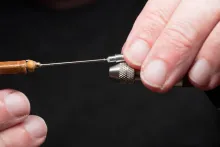
Make sure there's still a hole in it! |
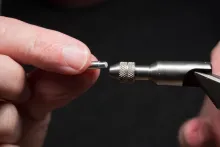
Ready for the vise |
Solidly mounted and ready tie tie |
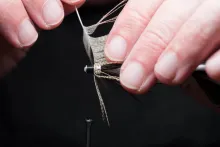
Start thread and prepare a hen hackle |
Stroke back the barbs and tie in tip |
Wrap the hackle as a wet fly hackle |
Tie down and cut surplus |
Stroke back the barbs and cover the bases with thread |
Catch the flash under the thread |
Wrap it forwards, tie down and trim |
Make a base for the front hackle |
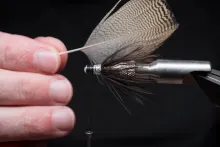
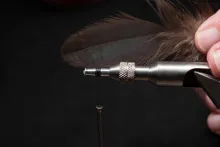
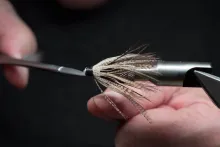
Select a wood duck feather |
Stroke back barbs |
Tie in by the tip |
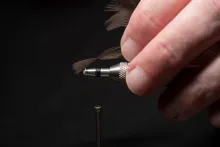
Fold back the tip |
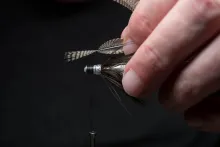
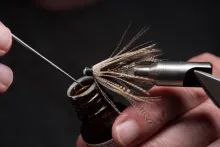
Fold back barbs and start wrapping |
Wrap in close turns while stroking back barbs |
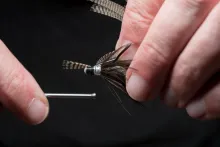
Tie down and trim surplus |

Form a small head and whip finish |
Trim thread |
Varnish a couple of times |
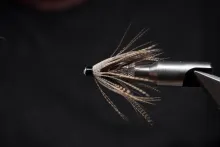
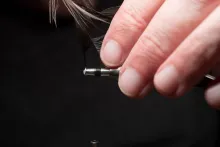
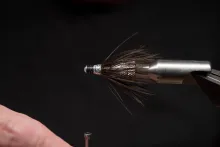
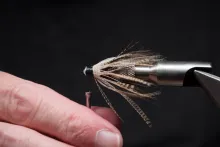
The finished fly still missing junction tube and a hook |
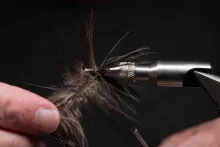
Two hackles

I use large hen feathers for the rear hackle. It’s easy to find suitable skins, and they are often inexpensive.
Not surprising the Wood Duck Stube uses wood duck for the front hackle and the Orange Guinea Fowl Stube uses ... yeah, you guessed it: orange dyed Guinea fowl.
You can essentially use many styles of hackle in the front, but it needs to be a soft type and rather long fibered, preferably 1½-2½ times the length of the tube.
You can use a large hen hackle, Guinea fowl, or some kind of duck hackle (usually flank feathers) where mallard, wood duck, gadwall, and teal are good contenders.
You can also use large and long pheasant feathers – like golden pheasant (GP) or plain ring neck pheasant, which is much easier to find – and pay for – than the GP.
You may need more than one feather if it’s a short type. Reaching around the tube typically requires more length than reaching around a hook shank.


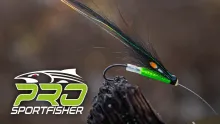
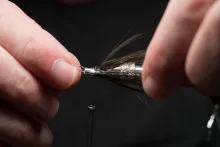
Some bling
If you like, you can add some flash to the fly. I show two ways of doing it here: the more visible flash straws tied in between the hackles and allowed to move along the fly together with the hackle as it works in the current.
Another way is as a body, which in this case becomes very short, almost a “midships tag”. This is also tied in between the hackles, but wrapped around the tube, and will appear much less visible on the finished fly. Once the fly is in the water, and the hackle moves, it will be seen through the materials, but not be nearly as visually “noisy” as the loose and mobile flash straws.
For a really subdued fly, you simply leave out all flash.
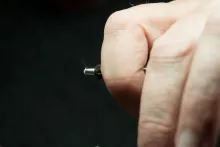
Lining the tubes

The lining is a suitably thin plastic tube, which is melted to form a collar in both ends of the metal tube.
Depending on your tube fly vise or tool, you can add the lining before or after the fly is done. It’s easier to do before – on the bare tube – but this requires that your tool can hold the lined tube.
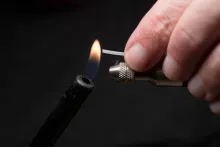
If not, you mount it on the finished fly, melting the rear end first, poking it through the fly and trimming it, and then melting the front collar, taking great care not to set your fly on fire!
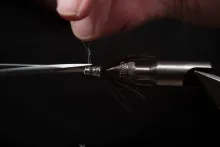
Mounting the hook

The choice is yours.
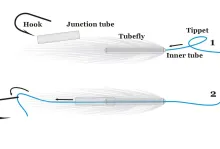
In order for the hook to sit properly, you add a soft guiding or junction tube to the rear of the fly. The metal bottles have a small diameter rear end, onto which you can press the soft tube, leaving it firmly attached to the fly. This is mostly done when the fly is tied, and just sits there, ready to accomodate the hook.
You can select the junction tube in any color you fancy - or think will add to the fly. The soft tube comes in essentially all colors as well as transparent, and you can use discrete or bright colors, colors that match the fly or contrast it. I even have some glow-in-the-dark tube, which can be "charged" with a bright flashlight or a camera flash. It will then glow quite intensely for a few minutes. I have no experience fishing flies with this kind of junction tube, but it might have an effect ... you never know.
Once you tie the fly on the tippet, the hook is drawn into this guiding tube. Read much more about how to tie a hook on a tube fly.
Fishing these flies

A common technique is down and across where the fly is placed out into the current, typically at a downstream angle, and then allowed to swing across the river in the current towards your own bank.
When fished like that, lighter flies will often fish very high, and you may need a heavier fly, a sinking leader or even a sinking line to get down to the fish. That will depend of depth and water speed. You can also mend the line upstream to make the fly sink a bit - and maybe adjust its path in the water.
When fishing lighter and smaller flies, you can also consider fishing the fly upstream, and letting it sink while you strip it in to keep contact with the fly and to keep it from going too deep.
Martin Joergensen
Hand picked for this article
- Log in to post comments