
We're now at the final stage of our rod buidling process, and ready to coat the wrappings. this requires a clean room and a lot of care. Jan-Ole Willers shows us in great detail how to do the best job and where to do it.

Before: A Bathroom |
 dustfree paintroom! -")
After: A (virtually) dustfree paintroom! |

Concentrated on the coating process |
This is an important part of the job.
Just think about what you are looking after when you are interested in a new rod, which you pick up in a tackle shop.
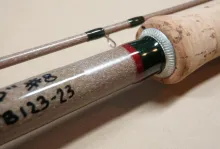
I first check the wrappings and their coatings. I check whether the coating is about to swallow the entire guide and how tidy the coatings look. I also look for enclosed air bubbles or dust caught in the surface once the guide was coated. These are the things you want to avoid.
The coating room
Preferably we use an area for coating which is virtually dust free and which we can blocked for lets say three days without changing the mood of the other inhabitants of your flat or house.
A temperature of around 21°C or 70°F and a relative humidity between 45% and 50% will suit you as well as the mixing and coating process. I have decided to use our small guest bathroom, down in the ground floor which is almost perfect for my needs. You can make it almost dust free with wet cleaning of floor and wall tiles. The curtains may be removed, and at least towels and other loose, linty items can be stowed away. I have build a makeshift working table from some wood remaining from the building of the house.

Everything for the coating process |
Mixing the coating
Mix the two component epoxy coating as accurate as possible, especially with regard to equal quantities. To do so I use disposable syringes, which can be bought in pharmacies for a very small price.
I mix in total the maximum amount of 4 millilitres, so I buy 2 millilitre syringes. Make sure that they are silicone free; otherwise the silicone will disturb the hardening process of both components in a serious way! Silicone is used in some syringes to keep the rubber front part of the pusher flexible. Although you can not see any silicone if you inspect a syringe of that type you can be confident there is some. Check with your pharmacist for syringes where the pusher is made from one piece without a rubber in front or buy from the rod building supplier of your choice if you are not confident with the ones from the pharmacy.
I always use the syringes just once to avoid the possibility of using a syringe, which was used for measuring the hardener, in the resin or the other way round. That would be fatal in the long term for the remaining epoxy components.
For the mixing process I prefer to use a small glass which is commonly used for shots or a mixing cup as shown in the picture. For mixing I use the handle of a tea-spoon. Also McDonald's stirrers can do well in this regard.
Follow the recommendations of the coating manufacturer. That means mixing the components slowly (to avoid bubbles) until the substance becomes clear again after being cloudy in the beginning of the mixing process.
Pour the ready made coating on an aluminium foil and breathe slowly and firmly on it, so the most bubbles will disappear. Check the time. From now on you will have about 25 to 30 minutes time to apply the coating until it starts to cure. Curing time may vary depending on brand and ambient temperature/humidity.
Coating the wrappings
Prepare the room you intend to use for the coating as far as possible to avoid any delay because the epoxy will not wait for you.
Start in one end of the rod and work quickly down for the first coating. If you have to divide the rod (as I have to do) finish one section before you bring the next one in front of you for application.
The get a good and even result you will need a motor which will do the turning during the drying process. Good and cheap stuff for the purpose are motors as they are used for mirror balls in the good old discos but also small motors used in some toys are a good option. Turning should be between 3 and 12 rounds per minute. The faster ones can also be used for the application process. If you do not have nor want to invest in a motor you also can do hand turning, but this I just recommend for one single project.

Coating while the rod is slowly turning |

Steady your hands for the best possible job |
")
Ready to dry |
Usually two or three thin coats are sufficient; everything else makes no sense, in my opinion, because we will just add weight to the rod, which will influence the intended action.
Some people prefer one very thick coat, I don’t. As I have learned from a paint and coating specialist every single layer of coating connects on molecular basis during the curing process with the surrounding layers. This means that with three thin layers we will have a tougher coating compared to one coating, which is as thick as the three thin ones. Therefore the thin three layer coating will not crack as easily. Do not leave too much time between two coatings; follow the directions that come with the product.
Done!
Now the rod is done and you are probably more than curious to bring the rod to the waterside for the first time.
Be patient!
Because after you have finished the entire rod the coating will need at least 4 or 5 days for a complete and deep drying. Even if the coating seems dry after two days it is still sensitive for approximately 10 days after the final coating against direct hits which might create small ugly dents in the surface.
- Log in to post comments


Michael,
I've trie
Michael,
I've tried a few products over the years, and about 4 years ago I started using ThreadMaster epoxy. Mix it up, put in on, put the rod in a turner, and forget it for about two hours, fairly hassle free, but there are many others out there that also do a good job. Maybe start by doing a search in the internet.
I have been using Fl
I have been using Flex-Coat high build to coat my rods and not pleased with the finish I am getting. Some times it is uneven like it is not flowing out like it should. What brand of finish do you use to get the thin coats?
I've built a a few r
I've built a a few rods, without any problems until my last one. When coating the thread, only the section above the handle and the first eyelet actually hardened. The remaining guides are still tacky. I'm not sure if my mixture wasn't exactly 50/50, or if I contaminated my coating. Any suggestions on how to repair the rod? Thanks.
this is great My wif
this is great My wife is alway telling me to find a place to build my rods I am using the dining room table now and I think I will recormend this, I am having a hard time geting a crisp finish and I think now that the temp and humidity might be one of the issues. I am planing on finishing one tonight and I will keep an eye on that. thank you .
Jeff H
Hi Bruce,
for sur
Hi Bruce,
for sure you can use the motor. It depends a little on your abilities, how you cope with the coating consistence and the brush itself and on the rotation speed. From my experience too slow is not that good, everything above 5 or 6 rpm is okay. As bigger the diameter is as more "ground speed" you are doing, you will feel the difference in that moving along the rod. Test it with the motor, if it does not suit you switch to old school. I personally like it to work with a motor which is doing 6 to 8 rpm for coating purposes.
Rgds,
Ole
Hi: Can I use my mot
Hi: Can I use my motorized drying set-up to apply my guide finish, too? It seems the finish would be easier and more conistent than turning the rod with one hand while applying finish with the other. Is a drying motor too slow? I have a buddy that's old school, that's teaching me to build rods, and he turns his by hand while applying the finish. He doesn't recommend using a motor.