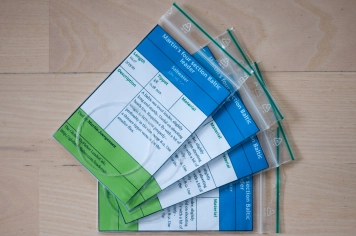
You can now print great looking labels to use for your home made leaders when you pack them in bags
When you tie your own leaders using LeaderCalc you can soon enough loose track of what is what. The cure for that is packing the newly tied leaders in clearly marked bags, and with the new function for LeaderCalc you can print some cool looking inlays for your bags using information directly from the formula database.
Same same, but different
The label function was a part of the old LeaderCalc spreadsheet and a similar function has now been implemented in the new system.
Once you have tied the leaders, you may want to pack them in bags. This function provides a neat inlay for each bag with all the information you need. No only practical, but also cool looking!
Select the leader you have tied or plan to tie, decide what size and number of labels you want to print, add a little optional information, and the system can generate the desired labels, ready to print and cut.
It requires a little work on you part, but the process is quite straightforward.
Bags
Most people want to have their leaders packed in bags, typically small grip seal bags (Ziploc type). And they will pack one leader coiled up in each bag. The labels printed here are designed to make the perfect inlay for such bags.
Bags are available in a colossal number of different sizes, but something like 8-10 by 12-15 centimeters or some 4 by 6 inches is usually good for this purpose.
The bags are sometimes called GL06, GL07, GL08, GL09 and so on, where the GL06 is a 4 by 5.5 inch bag (102 by 140 millimeters), very suitable for leaders.
You may have some useful bags already. If not, they can be typically be bought in office supply shops as well as online in many places.
The label form
Once you have the bags, select the leader formula you have tied. You may have saved it in My Leaders so it's easy to find again. Click the “Labels” link to the right of the leader drawing. This will bring you to the label form, pre-filled with the information on the leader you have chosen. The form allows you to edit and add information as you please.
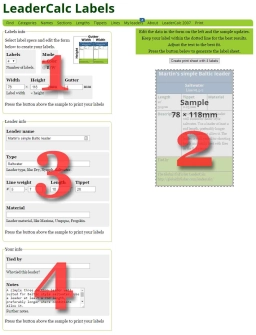
The form consists of four main sections:
1) Labels info: this is where you specify what size and number of labels you want to print.
2) To the right you will see a sample of the label you will be printing. Move your cursor over it to remove the overlay.
3) Leader info: this is the information on your selected leader. You can edit and add as you please.
4) Your info: your personal notes for the label.
A bit about measures
Controlling print sizes precisely from a web browser isn't easy and not an exact science, unfortunately. So even though the form for the LeaderCalc labels might give the impression of working with millimeters precision, it does actually have a hard time translating that into the same precision on paper.
So not only do I recommend reducing the size of the label a bit in relation to the bag size, but you might experience that the labels come out in a slightly different size than the one you entered in the form. I send the right sizes to the printer, trust me, but the whole process unfortunately lacks the precision that we are used to when printing from many other types of software.
Experiment, test print and note what measure you use for a certain printer and rely on that for future label printing.
The label system will save your label settings and remember them when you return to the form.
Setting up your labels
Take out your bags and get their measure. It might be printed on the package or you may have to break out a ruler. The form will be in inches or millimeters depending on your general selection in LeaderCalc.
Once you have the measures, type them into the width and height fields in the form. Remember that the bag measures are usually outside measures, so it's a good idea to subtract a bit, like 2-4 millimeters or about 0.05-0.1 inches on each side. That will ensure that the labels actually fit into the bags.
The gutter field indicates the space between each label. This is set to be very narrow, allowing you to simply cut between the labels, but you might prefer a larger gutter or even no gutter at all. Simply type in the desired measure.
Now take your paper and a handful of bags and assess how many will fit on a sheet. The label system will arrange them in rows, starting top left, and keep adding in the width until a row is full and then go to the next row.
You can print any sheet size you please - Letter or A4, even A3 if your printer can handle it - and landscape or portrait. You decide the orientation when printing, and LeaderCalc will fill the rows with as many as it can fit on a sheet. The size and orientation is set in the printing system of your computer and not in LeaderCalc.
Depending on the size of the labels, you can typically fit 4, 6 or 8 labels to a page, but you may have selected a label size, that gives a different number per sheet. Any leftover labels will simply spill over to the next page, and you can print all pages or just the first one as you please.
If your printer is black and white only – or if you simply want labels with no color – select the B/W mode. This will remove the background colors and print all text black.
Label content
When the label form opens, it has the information for the leader you selected, but you can edit that at heart's will.
While you edit the sample updates to reflect new content and measures. You need to keep your information short enough to make it fit within the dotted line of the overlay. If it's too large, the labels will still print nicely, but they might not fit in your bags.
Simply shorten down the information in the form until things fit.
If you want to print empty labels for filling out in the hand, simply check the "Empty" field. This will not empty the form, but the label will be cleared of information. If you print this label, it will have the headings and the section dividers, but no content. You can then fill that out yourself. Use a soft pencil, which will not smear if the label becomes wet. Unchecking the "Empty" field will reinsert your label information.
Printing
When you are satisfied with the single label, hit the button over the sample [ Create print sheet with nn labels ].
This will open a bare page, only containing your labels, ready to print.
It is important to notice that the display of the labels is not representative of the finished print.
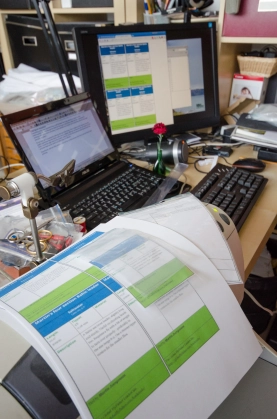
You need to print or print preview you labels to see how they look on the paper. The way this is done varies from browser to browser, but usually you press Ctrl-P or Command-P to print or select Print Preview from the File menu.
In the print dialog, you can select the proper paper format, landscape or portrait and the number of sheets you want to print. Set your margins as small as possible to fit as many labels on a sheet as possible. This can't be done from LeaderCalc since the options depend on the individual browser and printer. Some browsers like Firefox require you to select whether you want background colors to print. If you do, please tick this option in your browser's print dialog.
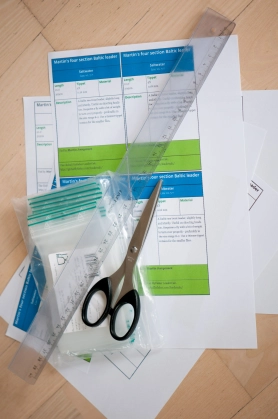
Print your labels and cut them using scissors or a knife and a ruler. Put them in your bags with the leader, and you have a bunch of professionally looking leaders.
Hand picked for this article
- Log in to post comments

