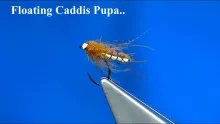
A great and high floating caddis fly made with foam as a base material and a very simple and cool technique.
I try to keep my Facebook feed full of fly fishing and fly tying. Of course it’s hard and basically impossible to keep it free of political rants, corona-related posts and cat videos… cat videos in particular!
My Fly Fishing and Fly Tying Bulletin

But luckily the major part of what I see is fly related, and browsing through Facebook is my daily “fly fishing and fly tying bulletin”, where I get lots of knowledge, entertainment and inspiration.
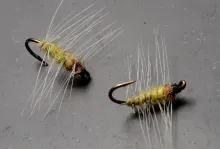
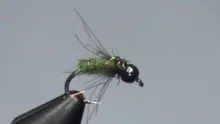
Swedish fly angler and fly tyer Kenneth Einars recently provided an important part of one such daily bulletin in the group called “Fly tying at its best” where he shared a series of photos showing his Floating Caddis Pupa. I was immediately intrigued, not least because Kenneth used a really cool technique to fuse and emboss foam for an extended body in one go using a simple tool... and fire!
I immediately contacted Kenneth, and he was kind enough to let me use his pattern and photos for this article.
The hemostat and the foam
The basic technique for this fly is probably applicable to many other patterns. Foam hoppers spring to mind, but beetles and even mayflies could be contenders too.
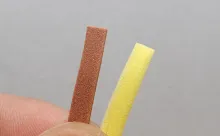
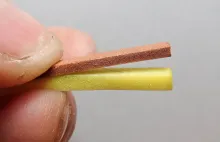
It’s pretty simple as it’s often the case with brilliant techniques. The main tool is a hemostat – a pair of locking tweezers originating from the medical world, but often used to squeeze barbs, unhook fish, hold flies while tying them onto a tippet and much more, and very commonly found in the arsenal of almost any fly angler. You need a straight set with some size, and preferably a fairly deep serration on both jaws. You take two strips of thin, floating foam, cut to the width of the jaws on the hemostat or slightly wider. Typically you choose a dark for the top and a lighter shade for the bottom. In principle you can use the same color or a single, slightly thicker strip.
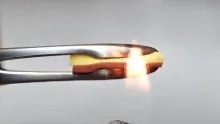
Let there be fire!
You then need a lighter or a lit candle, and use the flame to heat up the tips of the hemostat. They should be warm enough to melt the foam, but not so warm that they burn it. A little experimentation might be needed to get the right temperature.
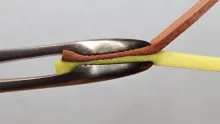
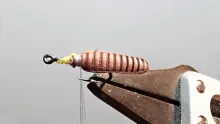
Once they are hot, you press the end of the two strips of foam between the serrated part of the jaws. Place the foam so that it sticks out a bit past the serrated part of tips and an equal amount on both sides of the jaws. Hemostats have a locking mechanism, and you lock them in order to hold the foam parts tightly together.
Now, trim the end of the foam just beyond the tips of the hemostat. You can round the corners a bit, but don’t cut off too much.
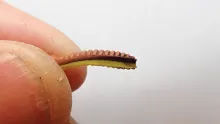
You now melt and “fuse” the parts together by running the flame along the edges and tip of the jaws. The foam parts melt together along the edge and take on the shape of the hemostat tips: rounded and tapered. Let the jaws cool a bit, unlock and open them, and you now have a nicely segmented and fused, extended foam body!


The rest is history…
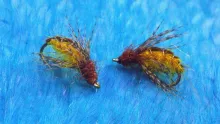
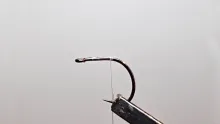
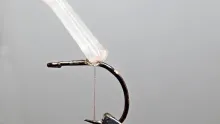
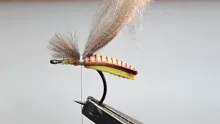
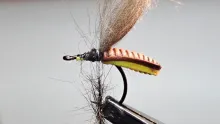
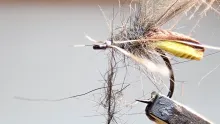
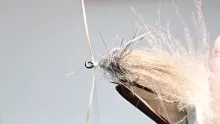
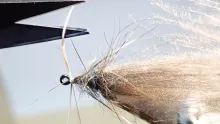
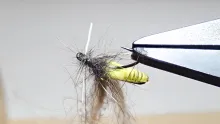
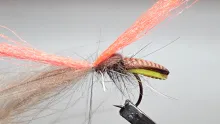
Using this extended body for a fly is basically the same as using any other extended foam body. Kenneth utilizes a bit of hot melt glue to secure the foam to a short shank hook – he has the flame going anyway – and the commences to tie a very nice caddis pupa using simple materials and straightforward techniques as seen below. The variations are of course endless, and you can choose other colors of foam, a different material for the wing buds, maybe add a wing or even a hackle and much more, to adapt this technique to your own patterns.


|
|
|
|
|
|
|
|
|
|
|
|
|
|
|
|
|
|
|
|
|
|
|


Fishing the fly
The fly can be fished both in running and still water. Most caddis pupa patterns are fished floating, and twitched while being stripped in or skated through a current. Wiggle the rod or tap the base lightly to induce some extra motion in the fly.
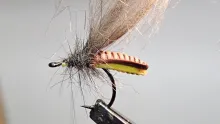
This pattern with its foam body and CDC will float willingly for a very long time, even in rough water, but might eventually need some floatant or CDC oil or Muceline.
- Log in to post comments