A tying station is a small, mobile board where you can set up your vise and your tools, making it quick and easy to move your favorite tying spot around: from the dinner table to the TV to the office to... the bed? This article gives you some ideas on how to make one yourself.
The idea for this contraption was conceived during the Christmas and New Year's holiday 2005/2006. I had quite a lot of time off, and as it seems customary during the holiday the TV was overflowing with good movies. The result was that I actually spent quite a lot of time in front of the tube. At the same time I was on my fill-the-box quest and these two things kind of worked against each other. In order to have them merge, I needed to be able to conveniently tie flies in front of the television.
Tour de France Tying
I have introduced the concept of tying in front of the TV before in my Tour de France tying article, and back then I just put my stuff on the coffee table in front of me. But since we rearrange our living room with regular intervals I can never really be sure that the couch or my comfy chair and the table and the TV are actually in line. Because of this I have occasionally been twisting my neck to catch things on the screen while tying.
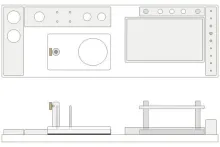
Drawings
Download simple drawings in PDF-format here:
Links open in a new window and require Acrobat Reader or some other PDF-reader.
Jan-Ole Willers: Make your own fly tying bench
If you build a bench, please send an image or two and a short description to martin@globalflyfisher.com to post as an inspiration to others.
So I needed something more flexible, something that made my tying independent of the living room arrangement. And maybe even something, which was set up permanently for the purpose of tying flies, which my girlfriend for some reason says the coffee table isn't.
I played with the thought of a small table, sort of a TV dinner arrangement thingy. But that takes up floor space and requires a rather large setup in order to be able to work in front of a comfy chair.
The gizmo had to be a small board of some kind, which I could rest on my lap or on the arm rests of my chair.
Tying stations
These things are often referred to as tying stations. They can be found in rather large numbers in catalogs and on the web. Most of them are beautiful pieces furniture with some excellent woodwork, but most of them have far too many facilities for my taste. I was aiming at something simple to hold the vise and assorted tools.
So it was on to the DIY stage.
What I wanted from my fly tying board was:
- a stable platform for my vise
- space for a small selection of tools
- space for smaller bags of materials
- holders for thread and wire bobbins
- space for waste
- holder for finished flies
On the other hand I didn't need a lot of space for materials like drawers, small cabinets or similar facilities. This device was just going to be my workbench, and was not meant for storage.
Few tools
I don't use many tools when I'm tying, so the need for tool storage would also be limited. I still wanted to be able to set my tools aside while tying: a pair of scissors, a bobbin holder or two, a dubbing needle (bodkin), a hair stacker, clippers for wire and bead chain. I usually have several bobbin holders with different colors of thread. Apart from that, I often use some wire on spools.
Enough talking. Enough thinking. Enough planning.
I went on to some practical experiments.
I needed some kind of board for the purpose, and luck would that had a couple of loose shelves lying around. So I sat down in the chair to try the planks on for size.
My original idea was that the board could rest on the armrests of the chair, but that was not a good idea. My hands, arms and shoulders were all too high and very uncomfortable in the right tying position. Luckily the other board was a bit narrower, and fit perfectly between the armrests.
When I placed the vise on the board, the height was fine. I had found my basic board: a glued pine board with the measurement 30 by 60 by 2 centimeters or 1 foot by 2 and about ¾ of an inch thick. It had sharp edges, but a little sandpaper took care of that.
Fixing the vise
The vise has to be steadily attached to the board. My vise has a very heavy, rubber-padded base, and merely placing that on the board was enough to secure it. But most pedestal-based vises are far too light to be able to survive this way when the boat rocks.
If you own such a vise you can either consider clamping it on to some kind of bridge, which you construct on the board, or - even better - buy yourself a heavy base. That will benefit you other places too.
Another option is to buy an inexpensive base, or even a whole, cheap vise, and fix the base to the board with hot melt glue or screws. Most vises have a 3/8 inches stem and will fit in each other's clamps and bases.
Layout
My next step was to start laying out the work area. I wanted some holes and pegs to set my stuff in and on. The vise with its heavy pedestal would just rest on the board. I didn't want to clamp it on, mostly because the clamp would protrude below the board and make it impossible to set it on a table. On the other hand I didn't want to build up a scaffold for the clamp, so the easy solution was just to put it on the board.
So I placed the board on my lap, and set the vise on the board. Since I'm right handed, it wound up a little to the left in order to place the fly in the center, which left ample space around the base for the rest of the building blocks.
Wooden scraps
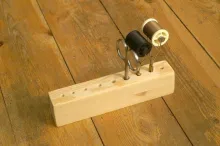
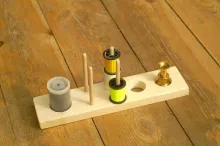
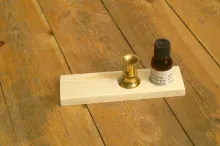
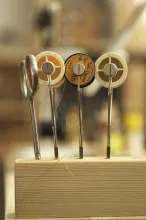
Now it was time to dig into the wooden scraps and find some small pieces in various sizes. My idea was to add a block with small holes for scissors, needles and bobbin holders and a flat piece of wood with a few pegs for spools and maybe one with some larger holes for my varnish, dubbing needle cleaner (a film canister) and what-have-you.
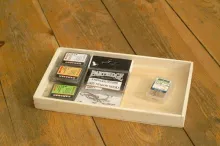
Apart from that, I was looking for some way to create a flat compartment for hook packages, small bags and the like plus maybe somewhere to put scraps and trims. I had some small trays, which originally contained dried figs, a popular Christmas fruit-treat here in Denmark. The trays were not exactly perfectly made, but could do with some cleaning and sanding.
The precise layout of this had to depend on the shape and sizes of the scraps I had.
My first experiment was to get out the blocks I had, and just move them around on the board, visualizing the finished board with holes, trays and pegs. I didn't get to a final result in the first phase, but found the wooden bits I could use.
Hey ho, hey ho!
These bits now went into the basement to my small workshop, and I started sawing, drilling, filing and sanding to get different units to play with. Some of my products didn't really wind up as I wanted, while others seemed useful.
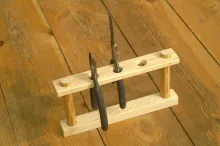
Using a small Dremel style drill I started drilling small holes in a block, and then expanded some of them to suit my tools. I also used a couple of large spade drills to make larger holes in a couple of flat pieces of wood. I often use pliers and cutters when tying, so I needed some kind of holder for heavier tools with thick handles. This was achieved with a couple of small strips of wood, a piece of dowel wood and a narrow spade drill.
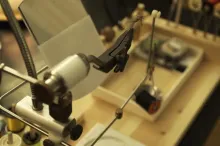
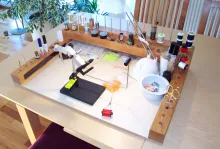
After sanding all the parts to a smooth finish with rounded edges and corners I was ready to finish the layout and fix the different parts to the board. Before permanently gluing anything, I put the tying station on a table and cranked out a few flies. I put all accessories on my vise - thread , tying background and my McKenzie vise light. I then placed the newly made wooden thingies temporarily on the board and put my tools in them. While first laying out the board I had formed a general idea and while tying I fine-tuned the placement.
Findings
My findings were:
- I needed my most commonly used tools to the right of the vise
- I wanted a tray right under the vise, maybe with a small container for smaller scraps
- Thread spools and other things could be placed behind the vise
- Larger tools could also be placed on the back edge of the board
- The large containers like varnish, wax and similar stuff to the left
Take care not to place any high tools or containers on either side of the vise. The area to the right is particularly sensitive if you tie with your right hand. If you utilize a rotary vise the left side should also be free of disturbing objects.
Onwards
I have already tied the first flies - both by a table and with the mobile tying bench in my lap - and it works. There is still room for improvements. I need a place to put my scraps. I have experimented with different small containers, and might be onto something with a small pen cup originally meant to be placed on a desk.
I also need a place to stick the finished flies. I bought a bunch of cheap cork disks in IKEA and I will probably just cut a piece of one of them and glue it onto one of the wood bits on the board.
Apart from that I'm quite satisfied with the result, and ready to fill the boxes in the coming weeks.
- Log in to post comments







Excellent utilitaria
Excellent utilitarian tying station! The only addition i would suggest is to inset in the board itself magnets for holding finished flies and various size hooks. This can be done with a router. Or you could just glue the magnet to the top of the board. Craft stores have all sizes of cheap magnets. Again - excellent!
I wrote you a while
I wrote you a while back and commented ow I liked your set up. I have since taken your idea and personalised it for myself. I hope I can post pictures here for you to see. I bought a used office chair with tall sturdy arm rests for $20 and modified it to suit my use. These pics of the desk I built should explain it all. I used some wood I already had on hand. It is about 24 x 12 inches work space. I see I cannot post pictures here. Please advise how I can send you 4 pics I have to share.
My vise is a LAW
Mark,
My vise is a LAW vise made by British Lawrence Waldron. These are made to order by the originator himself, or I should say were, because Lawrence retired. You can buy vises of an almost similar design made in cooperation by Snowbee and Lawrence. These are widely available.
Find more on Snowbee's home page.
Martin
Wonderful idea! I am
Wonderful idea! I am in the process of building a table like this that will attach to the arms of a comfortable office type chair. I am wondering just what brand and model is that rotery vice in these photos? I want to build a quality vice for myself. ( I am a machinest by trade)
Mark Lennox
Hee Martin,
great b
Hee Martin,
great bench, maybe for the finished flies you can use and inlay of a C&F box. Maybe stick it on the other side of the white backboard of the vise or upright in a corner. Cork will wear and tear in time and the microslits can be used over an dover again and the price of an inlay isn't expensive
Maybe some food for thought.
Good luck
Joel,
I'm afraid
Joel,
I'm afraid I don't sell anything. You will have to build your own.
Martin
hello
or I can buy
hello
or I can buy your vice Space
Martin Joergensen
thank you
benesty joel paris france
Scrap...oops, first
Scrap...oops, first I have to tell you that the misses says that the coffee table is for expensive picture books, peoples feet, and HER junk (not my clutter). Hey, at least she admits it is JUNK!!!
Scrap. I took a rectangular plastic container (don't know what was in it) cut the top off. It is 5" long, 2" wide, and about 5" deep (about the size and shape of a quart of oil). Glued velcro to the upper edge, and matching velcro to the front of my bench. Now I can velcro it to the bench (right in front of the vise) and all the little clippings fall right in. No longer leave a trail of clippings to the bathroom, and yes enough room in it for dead tea bags, etc.
If I ever get my bench clean and neat I'll take pics, and tell how It was made. Lots of storage at my fingertips, and my own TV.
Up until last year,
Up until last year, I tied at the kitchen table and my outfit had to be "portable". God smiles on fools sometimes and the right sized containers happened to be on hand. My grandfather's cedar tackle box was just right to hold two plastic compartment boxes that held hooks, beads, and thread spools. The single tray held tools, glue, the vise base and my magnifying glasses. The vise just fit inside the lid clamped with the table clamp to an"L" shaped braket I screwed on. All my materials went into clear plastic page protectors, available with many varying sized pockets, in 3 ring binders. I always worked on the dull side of a piece of white poster board to protect the table and give good contrast to the materials and reflect the light.
this web sight is aw
this web sight is awsome
I think there is a c
I think there is a cottage industry making portable tying stations. I bought a similar setup for $40 or so in Oregon a number of years ago. This one has an edge on the underside so it will stay put on a table. It also has a rack on the back for bobbins, spools, etc.
I keep it mostly set up so that whenever I have a need to tie, I pull it out of the closet, set it on my lap or a table, and I'm off to the races. =)
I have been trying t
I have been trying to assemble a portable fly tying station that would suit my needs for some time, and this article (plus the ones linked to it) have been very helpful. If you like tying on a pedestal based vise, one lighter weight option might be to cut a wooden base and fix it to the station with a couple of rare earth magnets - less heavy metal but good holding power. I have also found a number of useful light wooden boxes in various sizes at the local 'dollar stores.'