Why tie a White Belly Matuka?
A Parr-Marked Baby Brown-Trout Fly With a Reverse-Tied Mini-Marabou Wing & Belly.
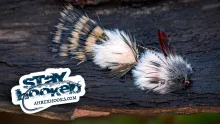
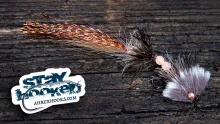
The White-Belly Matuka was developed for fishing the upper Arkansas River in Colorado whose preyfish are mostly wild-bred baby brown trout. The classic Matuka pattern is redesigned for this role by adding a belly feather to fill in the body and animate the fly. In white belly design, the over-the-top wired-down wing feathers of the classic Matuka are given increased animation by tying in one or two reversed-tied olive grizzly marabou feathers, that is, tied in with their quill end towards the rear of the hook. One or two reverse-tied white mini-marabou feather are also tied in under the hook adding a belly to the fly. The matuka tail is made to be more freely moving by using one or two soft-hackle olive grizzly-marabou feathers. Amber-colored barred silicone leg material are added to the sides of the fly to suggest lateral lines but also act to impart an additional source of movement. All these changes impart a fluid motion to the fly making it swim much like a preyfish and also act to flesh out the classic matuka’s slender-minnow-look into a fuller body shaped more like that of a brown trout fingerling.
Including parr marks on baby brown trout flies is important on the upper Arkansas River because it is managed as a wild-trout fishery and therefore has all age classes present. Parr marks are associated with young wild-trout because most stocked trout are older and have already lost them when put in a river or lake. While there are many baby brown trout designs out there most do not include parr marks—and are seemingly adapted from the look of a stocked brown-trout. In the White Belly matuka, parr marks are represented by the dark-barring seen on the yellowish field of a golden-olive grizzly feather that are tied in along both sides of the fly.
White-Belly Matuka Recipe-- Baby Brown Trout Variant
An extended version of this recipe is posted on the flytyingforum.com under “White Belly Matuka”
Hook: Gamakatsu B10 in size 1 or 2.
Weight: 6mm black brass cone
Backer bead: a bead placed behind the cone to center the cone and when firmly tied in and glued with UV-set glue locks the assembly on hook shank.
Thread: Nanosilk: 50D in olive color. The thread is tied in behind backer bead and built up there to force the bead into the cone. Add enough UV-set glue to fill the end of the cone and harden it. Then put a single layer thread base over the hook shank ending up at the rear of the hook shank so that the tail can be tied in.
Tail: The tail is done in the classic Matuka style--one or two grizzly marabou dyed sculpin olive feathers tied in on start of hook bend. Tie in the tail to make the overall length about 2-2.5" (50-65mm).
Ribbing wire: Brassie size (0.1 to 0.2mm) silver wire tied at rear of hook shank just ahead of the tail.
Body: Tightly wound 10mm diameter pearl Estatz or Cactus chenille.
Optional--Rear bridge tuft: A small stack of sculpin-olive grizzly marabou barbs tied in on top of the hook bend to close gap between tail and wing. Only needed if the stripped grizzly marabou tail feathers are too short or sparse to close this gap by themselves.
Wing feather: Select a sculpin-olive or olive grizzly marabou feather that has a long enough strip of long barbs that it can span the entire chenille body. Strip this quill of downy barbs and the short barbs side of the feather and then tied in reverse at the rear of the hook shank-- that is with the quill heading out over the rear of the hook shank. If the wing feathers available are not thick enough, I may tie in a second prepared wing feather.
Belly feather: White mini-marabou prepared and tied in reversed like wing feather but tied in under hook shank. After the belly feather is tied in, return the thread to the front of the hook shank while weaving the thread back and forth through the chenille to reduce the tie down of the chenille barbs. Spiral ribbing wire forward from hook bend to behind cone head. Make about 4 or 5 turns through both the wing and belly feathers.
Optional--Front bridge tuft: A small stack of sculpin-olive grizzly marabou barbs tied in front of the wing feather to close gap, if any, between the conehead and wing.
Parr marks: The tip of a golden-olive dyed grizzly feather on each side of the hook shank.
Sidebars: Lateral line: black barred amber silicone legs. Flank flash: one strand each of pearl and silver holographic tinsel.
Collar: Dark-olive ice-dubbing to fill the gap between the rear of the cone and the chenille body. Whip finish just behind the rear of the cone.
________________
0:00 Baby Trout as a Prey Fish in the Upper Arkansas River
0:32 Why add a White Belly
0:50 Why Add Flash
2:05 How Trout Attack Prey
2:50 Why add Parr Marks
4:10 Overview of White Belly Matuka (WBM)design
4:39 Tying the WBM
24:55 Tank Testing the WBM
25:56 Tank Testing a Classic Matuka Tied with a White belly
27:04 Comparison to Commercially Tied Bugger Fly
_____________
troutracker[at]yahoo[dot]com
- Log in to post comments


