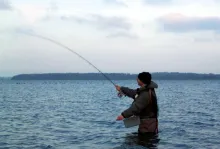
A couple months ago my wife said she had found the perfect gift for me. She had arranged for me to take a bamboo fly rod making class.
If you have read my previous two posts (IKEA Fly Tying Board: How to make a 10-dollar tying station based on a cheap IKEA cutting board. Published Nov 24. 2019 and DIY wooden landing net. Published Jul 18. 2021), you know I like to tinker with “stuff” and make “things” with my hands (a very welcomed break from my daily job).
However, I have two disclaimers for this time around:
- this endeavor was my beloved wife’s (Annette) idea; not mine and
- this would not have been possible without the expert guidance, patience and teaching abilities of a great instructor.
This saga began several years ago when I was introduced to fly fishing at the University of Kentucky where I learned the basics and was forever “hooked”. I purchased some entry level gear and started my journey. As time went by, I got a bit better and graduated to a more expensive rod and reel. These are magnificent pieces of equipment and performed so much better than my initial rudimentary rod/reel combo!
Time continued to unfurl and one day for some unexplained reason I started to research split bamboo fly rods. I read every article I got my hands on, watched every YouTube video available and started to consider the idea of purchasing one. I had lots of work to do as there are so many variables to consider and choices to make. From weight, length, number of pieces, to condition (new or used), taper, handle style, etc. This became an overwhelming and all-consuming thing. I can’t remember how many websites, discussion groups, Facebook posts I read, but you can believe it was a lot!
One day Annette and I took a little trip to the Smoky Mountains in Tennessee just to unwind and enjoy a change in scenery. We stopped at a local fly shop and there we saw several beautiful hand-made split bamboo fly rods. We admired them, picked up a pamphlet from the rod maker and returned to our lives, work, house chores, the usual…but I continued to search for bamboo rods. I considered some offerings on eBay, looked in Amazon, searched several vintage rod sites…
We admired them, picked up a pamphlet from the rod maker and returned to our lives ...
A couple months ago my wife said she had found the perfect gift for Father’s Day, birthday, Christmas, wedding anniversary and other assorted observed holidays. She had arranged for me to take a bamboo fly rod making class with the same craftsman who had several rods on display at the Smoky Mountains, Mr. Gregg Martin Jenkins.
Little did I know she had kept that pamphlet and one day while cleaning her desk, it fell open to the section describing the rod building class! That was when she decided this was to be my gift.
The discussion with Gregg started via emails and phone call to determine the characteristics of the rod best suited for my fishing spots and quarry. After some considerations we settled on a 7’ 6” 5 wt rod. We then discussed other details: color, materials, hardware.
He sent me a few links to websites so I could browse and select what hardware I wanted. Lastly he recommended I bring work gloves (bamboo edges are quite sharp and splinters are common) and comfortable shoes (as we would spent a lot of time on our feet).
Once at Gregg’s shop, which is equipped with all the necessary tools, we started with raw culms he had already expertly selected for the job and which had been split in half. He coached me on how to perform the first step; managing the nodes. We knocked-off the interior node material using a hammer. Then he instructed me on 2 different methods to reduce the exterior “humps” of the nodes: 1) using a file and 2) using an electric orbital sander. He also showed me what to look for to ensure all the unwanted material was removed to achieve the perfect results.
After that, we moved outside for the next step; flaming. This step tempers the bamboo fibers and removes excess sap making the cane stronger and more resilient. As I had chosen to build a blonde rod, we only flamed the interior of the culm to preserve the natural straw yellow color of the exterior surface. Once flaming was completed, we used a wire brush attached to a drill to remove the black charred material to help keep everything else clean.
We then moved to splitting. We measured each culm leading edge to establish the desired width for each strip. Gregg did the first few to show me the procedure. Armed with a knife and a hammer (and lots of nervousness) I started splitting the culm. Some of my strips turned out quite thin and useless, but Gregg continued to encourage me saying this is normal and to be expected. He showed me how to manipulate the culm to control the splitting. With his coaching I didn’t do too bad, but I admit I think this was my least favorite step as I felt I wasted precious bamboo material.
After the strips were done, we moved to removing the excess internal node material with a bench sander and straightening and flattening the nodes using an alcohol burner and a vise. Its impressive to see how the cane responds to all this manipulation going from its natural curves and bends to amazingly straight.
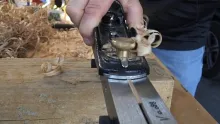
At this point the strips were ready for the next step: using a router-type machine we converted the rectangular strips into long equilateral triangular strips. This was followed by determining the taper formula, setting the steel planning form to the desired depths using a depth gauge (I have to admit this part was humbling as my understanding of the gauge readings was not up to the challenge) and hand-planning. Most of the bamboo material ends up as shavings as you reduce the original strips to very thin sections.
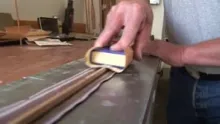
After a dry fitting, the sections for both the butt and tips were glued and secured on a glue binder. Once dried, the glue and thread were removed and the sections scrapped and sanded smooth.
Many other steps followed under Gregg’s expert guidance: gluing cork rings to form the handle and turning it on a lathe to the desired shape and thickness, measuring and cutting the blanks to the correct final lengths, fitting ferrules and tip tops, measuring and fitting the guides and completing all the wraps (I am very grateful for the invention of electrical lamps and magnification as this was quite the challenge for my aging eyes!).
Lastly all sections were dipped three times in spar varnish with the help of a mechanized system (built by Gregg using pulleys and a small electrical motor) that draws the section out at a specific rate which prevents unwanted drips and runs.
All this work took place over six days from 9 am until 5 pm or so… This was a lot of work, but every minute of it was worth it. I witnessed the transformation of a simple piece of bamboo culm into a beautifully finished rod. But not just that, this is a rod I made with my very own hands, a rod that I gave life to, a rod that has a special history to me and a special place in my heart.
One thing I especially enjoyed is that this was a one-to-one class: Gregg and me. He gave his undivided attention to my work. He took the time to explain each step with enough detail giving me confidence to perform every individual procedure. He would let me work, occasionally checking on how were things going. Upon finishing each step, he would inspect the piece and when needed would gently point to areas that needed extra attention. Every now and then, while inspecting my work he would give me a smile which communicated his approval and gave me more confidence. His teaching style is approachable, comfortable and directed at achieving the best possible results.
At one point while waiting for glue to dry, Gregg suggested we go outside to practice casting with one of his bamboo rods. This was important for me as I had never casted one and the casting characteristics of a bamboo fly rod are so different to what I am used to with my graphite one. My first attempts were laughable and a bit embarrassing, but in about 20-30 minutes, slowing my casting rhythm down, and allowing the bamboo to do its job, I was casting fairly well.
Another enjoyable aspect was the friendship and camaraderie during my stay. Gregg and Shelli (his wife) made me feel at home, like old friends. They provided lunches, drinks, and I was even treated to an exquisite dish of rice with beans and pork belly! Now, that is a host.
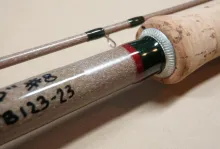
The rod (which also included a sock and aluminum tube) turned out beautiful. After it was completed we went to cast it at a local pond and I got my first fish on it! I was elated and in awe at how beautifully this rod bent back and forward, delivering the fly with such delicacy. The organic movement of this piece of art cannot be compared to the stiff and rigid movement of my graphite rod.
We celebrated my graduation with diner at a local restaurant along with other newly made friends (Vicky and Scott). We also got T-shirts with his business logo.
Thank you, Gregg, for not only teaching me how to make a split bamboo fly rod, but also for your warmth and friendship. Thank you, Shelli, for opening your home to us and for such delicious treats and welcoming spirit and spontaneous sense of humor. Also thank you Vicky and Scott for receiving us, (two complete strangers) in your home and sharing your food and friendship with us (and for fixing the flat tire on my car!).
If you want more information on the bamboo fly rod building class, please visit www.martinbambooflyrods.com. You can also contact Gregg at (+1) 919.710.5720 or email him at gjenkins721@gmail.com.
- Log in to post comments


