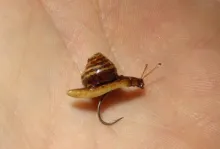
This pattern, which takes its name from the popular appetizer Guacamole, was inspired by the 'Bar Guac' special at a local fly fishing hangout.

This pattern, which takes its name from the popular appetizer Guacamole, was inspired by the ‘Bar Guac’ special at a local fly fishing hangout.
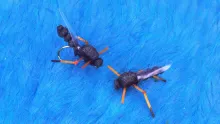
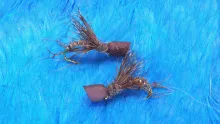
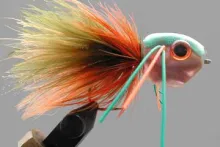
The Bar Guac Hopper is a color variant of the Slim Jim Hopper pattern. Each of the colored materials were selected as per the ingredients in a guacamole recipe and the dipping chips that accompany it (i.e. onion, tomato, avocado, cilantro, sour cream and tortilla chips). While this is all fun, and probably making you more than a little hungry, the pattern works great for catching mountain stream cutthroats as well as big river rainbow trout.
Material colors were selected as per the ingredients in a guacamole


Materials and tying Instructions
Step 1.
Pre-make the hopper bodies by sticking the sheet of olive adhesive back furry foam to the green 2mm foam. Then use a large (3 cm long; size 10) hopper body cutter to stamp out the required number of foam body forms.

Step 2.
Insert the hook in the vise, attach the thread and wrap a 3-layer thread base onto the hook. End with the thread at the mid-shank of the hook.

Step 3.
Place a drop of Zap-A-Gap on the rear thread wraps only and spread with bobbin. Then attach the foam body to the hook with 4 or 5 firm wraps of thread.

Step 4.
Advance the thread to just behind the hook eye and apply another thin layer of Zap-A-Gap to the remaining thread wraps.

Step 5.
Bind down the front half of the foam body with 3 or 4 firm wraps.

Step 6.
Attach a 6 cm long piece of EP 3D fibers, about the diameter of a match stick, to the top of the fly with 2 thread wraps.

Step 7.
Advance the thread back to the rear segment tie in point, over the top of the fly. Then, lightly pull back the EP 3D fiber wing.

Step 8.
Bind down the wing with 2 or 3 thread wraps. Trim the fibers so that the overall length of the wing extends just past the end of the rear of the foam body.

Step 9.
Prepare a strip of 2 mm white foam. This strip should be 2.5 cm long and about the width of the body. Trim the end of the white indicator strip that will be facing rearward into a pointed shape. The white foam indicator strip acts as a visual aid to help the angler see the drift of this low riding pattern. It also provides additional floatation for the pattern.

Step 10.
Secure the indicator strip to the top of the fly with 2 firm wraps of thread. Overlap the wing by about 4 mm with the pointed end of the white foam indicator strip.

Step 11.
Prepare a set of round rubber legs by cutting two individual pieces off the hank, folding them in half, and cutting. This should result in 4 roughly equal length round rubber legs.

Step 12.
Bind down the legs on both sides of the rear segment tie in point of the body with 3 or 4 thread wraps.

Step 13.
Lift up the white foam indicator strip and advance the thread to the front segment. Bring the thread over the top of the fly when you are executing this step.

Step 14.
Bind down the white foam indicator strip with 2 firm wraps of thread. Trim the excess foam indicator strip leaving about 3 mm.

Step 15.
Bind down the second set of legs on both sides of the front segment tie in point of the body with 3 or 4 thread wraps.

Step 16.
Pulling the foam head back out of the way and advance the thread forward to the hook eye. Whip finish.

Step 17.
Flip the fly over in the vise so it is belly up and catch all of the legs together between your thumb and forefinger. Trim them off so that they are all of roughly equal length.

Step 18.
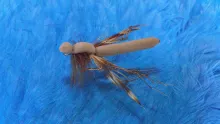
Trim the front of the foam body (head) into a blunt point.

Step 19.
Carefully apply a small amount of Zap-A-Gap to the exposed thread wraps securing the legs. You do not want to get Zap-A-Gap on the rubber legs or it will cause them to become brittle.

Your Bar Guac Hopper is now complete and you are ready to head out on the water!

- Log in to post comments