A simple and flashy streamer that’s originally designed for smallmouth bass


The Freaner Flasher streamer was designed by Mr. Claude Freaner in the mid 1990’s as a smallmouth bass fly. Claude was well known in the smallmouth bass conclaves held throughout southeastern US. He showed the then unnamed fly to my fishing companion, Richard Warren, during one of the James River Virginia smallmouth bass “claves”. Richard dubbed it the Freaner Flasher. The fly became a popular pattern in our fly-fishing club, Triangle Fly Fishers. I always have a few “Freaner’s” in various fly boxes. The Freaner Flasher has never been a commercially produced fly, although I recall it was once featured on the Warm Water Fly Fisher web site but not longer can be found on their site.
Mr. Freaner originally tied his creation on a Mustad 7966 keel hook in sizes 6-10. Unfortunately, Mustad discontinued that model hook. Today’s Freaner’s are tied on traditional streamer hooks.
The Green Caddis Outfitters model GC231B barbless hook in sizes 6 & 8 is an excellent choice, as used in this tutorial. While the Freaner is not a complex pattern, it can teach a new tier good proportions, material handling, tying in materials and so on. A seasoned tier can produce a season’s worth in an evening tying session.
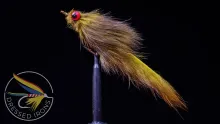
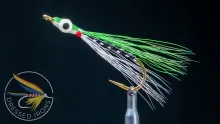
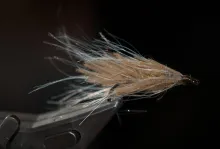
Materials used in the fly consist of small lead or bead chain eyes, Krystal flash chenille as a body, a marabou tail, and has a wing of gold holographic tinsel.
When fished, the fly swims inverted, placing the wing on top and the eyes on the bottom. I sometimes tie in a strip of lead substitute wire on top of the hook for added weight and to assist with the keel effect for the pattern.
White and pearl are my preferred colors. However, black, tan, chartreuse, green, and root beer-colored patterns are worth tying. I once caught a chunky 18” smallmouth bass on root beer Freaner Flasher. In addition to being an excellent smallmouth bass fly, I have done well with the pattern for largemouth bass, bluegill, crappie, white and hybrid bass.

A productive method of fishing the Freaner Flasher is to cast across stream and mend the fly line to allow the fly to sink as it drifts downstream. Oftentimes the fish will strike as the fly comes tight during the swing or as the fly hangs in the current below you. That is especially true with rivers and streams that support a population of white bass. If that does not illicit a strike, allow the fly to hang in the downstream current for a few seconds before stripping the fly back towards you. Casting the fly to the shore or working the fly around rocks can be productive. Do not overlook the effectiveness of this pattern in ponds or lakes when slowly stripped or bounced over the bottom.

Let us get on to tying the Freaner Flasher.
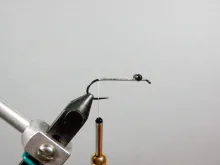
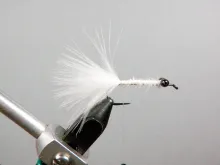
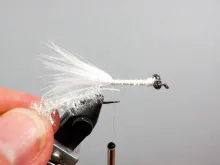
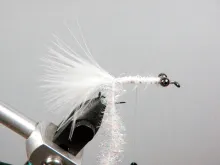
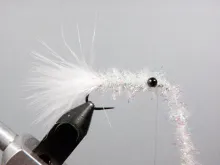
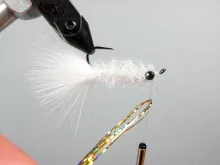
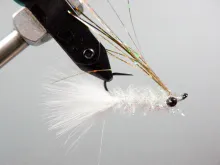
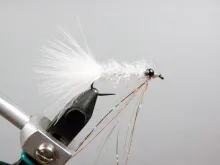
Step-by-step in pictures
See the instructions above for details.
|
|
|
|
|
|
|
|
|
|
|
|

Tying Notes
If you are fortunate to have keel hooks in your inventory, use them. I have used a variety of hooks over the years for this pattern and have no complaints. Any streamer hook will work. I have considered tying this pattern on a stinger style hook.
A hot spot fly head can be incorporated into the fly by switching to an alternate tying thread or coloring white thread with a permanent felt marker when dressing the fly head at the conclusion of tying the fly.
Adjust the thread color to the material color used. I sometimes mix twisted flash tinsel with flat tinsel for the fly wing as well as adding some flash to the tail of the fly. The opening on bead chain will sometimes be rough or the metal post will slightly protrude. By applying a drop of thin UV resin to this spot will prevent fly tying thread from fraying and possibly, your leader from catching on this spot.
At the time of this writing, I have noticed the brass eyes of the flies used in my examples have tarnished. This too can be overcome with the application of a topcoat of thin UV resin.
Jim Burchette
Conclusion
In this day and time of time consuming, complex and multi material flies, I find the simplicity and effectiveness of this pattern continues to be rewarding. Since learning of this pattern some 25 years ago, I always have a supply of “Freaners” in various fly boxes.
I wish to thank Mr. Claude Freaner for the time he took corresponding with me. In addition to being a talented fly tier, Claude is a retired aeronautical engineer and a master at seed bead artistry. His seed bead fish patches are treasures for those who possess them, and his large, framed seed bead fish are truly masterpieces.

- Log in to post comments