I have been connected with Dmitri on Facebook for some time, and have been thoroughly impressed by his skills as a fly tyer. He generously posts long and detailed step-by-step photo series and also posts fly tying videos on YouTube.
I wanted to expose Dmitri's tying to more people and approached him about publishing some patterns here on the Global FlyFisher and he agreed. Most of Dmitri's posts and his videos are in Russian, and even though fly fishing and fly tying is an international language, having an English text and list of materials will probably help the many of us who aren't fluid in Russian. There's also a video in the bottom of the article showing the tying with Dmitri's comments in Russian.
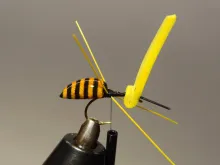
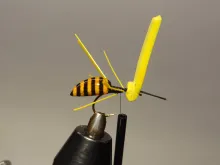
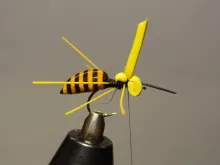
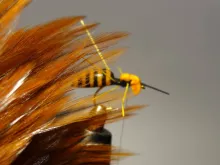
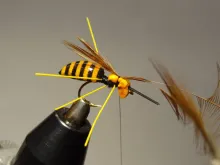
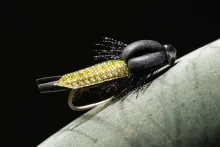
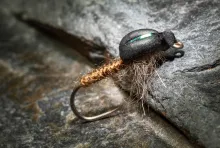
...an impressing imitation of a wasp
The wasp
Dmitri Tseliaritski
The foam wasp
The post from Dmitri that spawned this article was a Facebook post which he simply called Wasp SBS. The first picture showed an impressing imitation of a wasp, but in spite of being very lifelike, it looked fairly simple. Dmitri had added about 30 step-by-step photos showing the tying sequence, and these are the photos, which you also see below in the tying instructions.
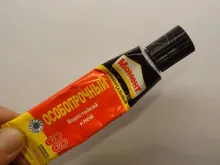
I have also added a materials list, which Dmitri has approved. The glue is obviously Russian, and not easy to get for us westerners, but contact cement or thin neoprene glue should to the trick. Use it sparingly. A little goes a long way. The legs are broom bristles, a material that has been mentioned before here, many years ago in this ant article.
you will need warm yellow and black markers as well as varnish and LCR
Start by making the abdomen. Glue together yellow and black craft foam to create a 1-1.5 centimeter or 1/2 inch stack. Cut this into striped rods of about 0.5 x 0.5 centimeters or about 0.2 x 0.2 inches. One rod will form the base for one wasp abdomen.
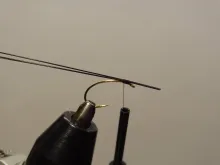
Start the thread in the front of the hook.
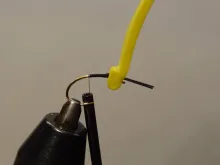
Tie in two black bristles pointing forward, forming the antennae. Just leave them sticking out parallel in the front. Trim off surplus.
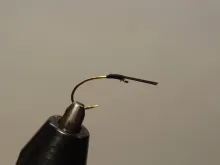
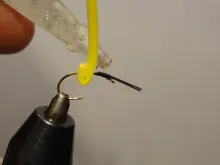
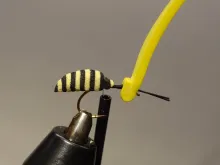
Cut a narrow (0.5 cm/ 0.2”) strip of yellow foam. Bend back and glue one end.
Stick the hook through the foam in the center of the bent piece and slide to the front
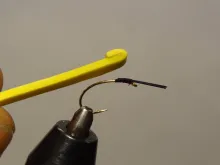
Glue the foam and press it over the bases of the antennae.
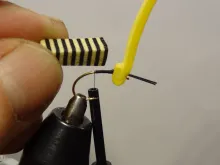
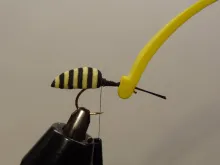
Take the striped foam rod and trim to a tapered shape using a pair of sharp scissors.
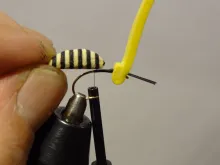
Tie in the abdomen leaving a bit of space behind the front foam.
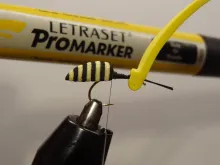
Mark the yellow part with a warm yellow marker if needed.
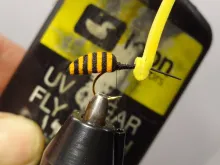
Cover the abdomen with a thin layer of LCR and cure.
Tin in the hind and front legs in one go, one set on each side.
Cover the front lags with thread, pressing them forward to behind the head foam.
Tie in middle legs as one bristle under the hook.
Varnish the central part of thread over the legs. This will be visible on the finished fly.
Bend back the head foam strip to form the top of the head and tie down.
Cover foam with thread to the middle set of legs.
Dub lightly over the tied down foam.
Bend the foam back forward to right behind the head and tie down.
Trim off surplus foam.
Trim the head to a pointed, tapered shape using sharp scissors.
Use the yellow marker to color the head foam if needed.
Pick two identical, shiny rooster neck feathers.
Strip off the base barbs and tie them in flat, pointing backwards right behind the head.
Trim the feather butts, cover the tie in spot with some dubbing, whip finish and trim thread.
Mark the eyes with a black marker and cover with LCR.
Bend legs and antennae using heated tweezers. Trim to length. Mark the tips of the legs black.
You can use a variety of foam types, as long as they are closed cell and will float. I have used inexpensive craft foam, which is widely available and inexpensive.
You can glue the foam with good, old fashioned contact cement - also cheap and easy to find. Thin layers on both surfaces, let dry, press together is the method. Super glue can also be used.
For the wasp bodies you make a stack of yellow and black from about 1-2 mm foam, let it dry and then punch out cylinders with a small metal tube, maybe filed to have a sharp cutting edge in one end. Simply punch the tube through the foam with a hammer over a wooden board.
The Global FlyFisher has been online since the mid-90's and has been free to access for everybody since day one – and will stay free for as long as I run it.
But that doesn't mean that it's free to run.
It costs money to drive a large site like this. See more details about what you can do to help in this blog post.


foam
Can you please let me know what size foam and where you got it from? also, what type of glue are you using to hold the foam together please.
Sources
Shane,
You can use a variety of foam types, as long as they are closed cell and will float. I have used inexpensive craft foam, which is widely available and inexpensive.
Rainy's Flies has a ton of different special foam products for fly tyers, also sheets:
http://www.rainysflies.com/foam-products/cross-link-sheet-foam
They also have a ton of pre-shaped foam products, which might be useful:
http://www.rainysflies.com/foam-products
You can glue the foam with good, old fashioned contact cement - also cheap and easy to find. Thin layers on both surfaces, let dry, press together is the method. Super glue can also be used.
For the wasp bodies you make a stack of yellow and black from about 1-2 mm foam, let it dry and then punch out cylinders with a small metal tube, maybe filed to have a sharp cutting edge in one end. Simply punch the tube through the foam with a hammer over a wooden board.
You can also opt for finished bodies like these:
https://www.lurecraft.com/Bee_Wasp-Foam-Bodies-1_4/productinfo/13X1203/
Martin