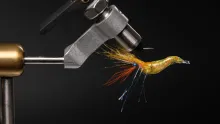
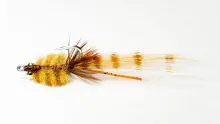
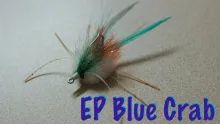
This is a fly made for a very specific purpose: cod fishing. It's used on a sink tip or sinking line over fairly deep water (3-4 meter or 10-13') from a float tube, and will turn upside down and 'walk' on the bottom.
Made for cod
This is a fly made for a very specific purpose: cod fishing. It's used on a sink tip or sinking line over fairly deep water (3-4 meter or 10-13') from a float tube, and will turn upside down and 'walk' on the bottom. It's a great fly for these fish that often feel like a bag of marbels when you lift them out of the water because their stomachs are so filled with crabs. It's hell to cast this fly because of the weight of the fly and line, but as long casts are normally unnecessarry, it's not a big problem. For the faint of heart I have developed a smaller version too: The Femmer Crab.
There's no doubt that this fly can catch other crab eating fish like permit and redfish - even bonefish if made in smaller sizes. It's definitely worth experimenting with. These days you can consider using a light curing resin (LCR) in stead of the melt glue.

No tying
It's tied completely without the use of vise or thread, but is held together with glue from a glue gun - the type that melts a stick of transparent non-toxic glue. It can probably be made with two-component glue too, but it's more work - and poison.
| Hook | 6-2/0 stainless streamer straight or down eye. |
| Body | Glue and a small tuft of sparkling red flash-dubbing. |
| Eyes | Heavy lead eyes. |
| Legs and claws | Red rubber band. |
Do this:
- Prepare the legs by cutting rubber band into suitable lenghts. You need three thin ones and two thick ones. All approx. 6-7 cm long (2-3")
- Tie a knot on the middle of two of the thin ones and a knot close to the end of the two thick ones.
- Cut the thick ones to make claws on the outside of the knots (see picture)
- Lay the legs and claws down on a piece of oiled baking paper in a crab-looking pattern.
- the claws pointing forwards, almost paralell (knots outwards)
- front legs pointing forwards (knot to the back)
- middle legs perpendicular to the hook shank (no knot)
- hind legs pointing backwards (knot to the front)
- Prepare a small tuft of dubbing, a bit smaller than the finished body
- Have the dubbing, hook and eyes ready
- Apply warm glue in a poodle on the rubber bands
- Lay the dubbing on top and press the hook into the poodle
- Put the eyes into the warm glue and secure with some extra glue
- Arrange legs and claws properly
- When the glue is almost stiff (less than a minute) lift the paper and curve the shield a bit
- Let the whole thing settle and remove from paper
- Color the shield on the outside with a water fast, red marker.
- Trim legs if needed
The whole gluing process has to be finished in one go while the glue is still warm and soft. The hot glue is far better than epoxy for this purpose:
- It's always ready. No mixing
- It's non toxic
- It doesn't harden before you can use it
- It 'dries' in a short time (less than a minute), but keeps soft long enough for you to work with it
The major disadvantages are:
- It's warm
- It's not as hard as epoxy when it's dry
- It's not completely clear when dry
- It can draw strings
- Log in to post comments


you can also use whi
you can also use white super tubing