
We feature a ton a fly pictures on this site and emphasize good quality in these pictures. This is an article about how to get the best shots of your flies.


This article is the latest incarnation of all our tips and ideas on taking fly pictures, collected in one place - and with a lot of new material, not least pictures. It will offer detailed advice and a lot of inspiration and cover all kinds of fly photography, from meticulous studio setups, over makeshift arrangements to shooting flies in the field.
It might get a bit technical at times, but I promise it will also feature a ton of great fly pictures and definitely give you some inspiration and some tips for your fly photography.
Cameras and lenses
Covering cameras for any type of photography is like hunting a ghost. The development is so fast and new facilities and capacities keep on being added to all cameras, and almost whatever I write, there's a risk that it will be outdated and maybe even wrong in a year.
We will be going through
- Cameras and lenses
- We will be going through
- Compacts
- SLR's
- Tripods and support
- Flash and lamps
- Diffusers and reflectors
- Light box or light tent
- Setups and backgrounds
- The background effect
- Holding the fly
- The floating fly
- Exposure and depth-of-field
- Varying views
- Long exposures
- Makeshift setups
- Setting up lamps
- Color temperature
- Selecting flashes
- Using the built-in flash
- Other subjects
- Outdoors photos
- Simple variation
We have written extensively about photography and covered fly photography specifically before.
Compared to my old article on Digitizing flies from more than 10 years ago, the pace is much slower now, and if I keep to general observations and advice, it might hold more than few years.
Regarding cameras there are essentially two basic ways to go:
1) Compact - Point-and-Shoot AKA P&S
2) SLR - Single Lens Reflex AKA DSLR
If you do not have a camera, buy a good compact camera and make sure it has a decent macro setting and as much manual control as you can get.
But fret not. Most compact cameras are way better at close-up photography out of the box than any SLR. The large SLR-camera may have superior image quality and better controls, but it requires special lenses to get close enough and even then it might sometimes fall short. Almost all all-round lenses for SLR's that boast a macro setting are not nearly adequate for fly photography.
I will cover both types of cameras in the article, but go into detail about using the compact camera because this is the most common type of camera, and in some cases actually the best choice.
Compacts
Oddly enough most modern P&S cameras have surprisingly good macro facilities. Actually it's not that odd, because it's much easier (and less expensive) to construct a good macro lens for a compact camera than a macro lens for a large SLR.
When you shop for a P&S or check the macro facilities on one you have already, you are looking for a couple of things:
Macro capabilities - how close can you go? And is the macro worth anything when the lens is zoomed? You want the best possible macro at the longest possible focal length. That will give you distance and a blurred background. You also want a large maximum aperture (that is the largest number when the camera is stopped down, not the brightest setting!) and manual control. Few P&S cameras offer anything above f/8 and even fewer allow you to control this manually. I will return to this subject in the section about depth-of-field.
Manual focus and settings - you want to be able to overrule the automation. Manual focus will set the focus where you want it and not change it every time you press the shutter. And manual exposure will allow you to stop down as mentioned above. Controlling white balance enables you to control light and get consistent shots. I will cover this later in the article.
Check the camera specs and the manual and maybe shoot a few shots with it before buying. Bring a fly to the shop and check out how close you can go and how much you can control.


SLR's
I won't offer much advice on SLR cameras. Chances are that you already know quite a bit about cameras if you have one. If you don't, you need to seek advice on buying elsewhere.
But I will cover selection of a macro lens, a magnification filter or extension tubes, which is what you need to take decent fly pictures with a large interchangeable lens camera. Standard lenses might have the term "macro" printed on them, and a few do actually have a macro setting, but I still never saw one that actually did the job well.
Real macro lenses can go really close. The range is usually expressed as a relation between the subject and its image on the sensor as a couple of numbers image:subject, like 1:1 - full size on the sensor, 2:1 - double size on the sensor, 1:2 - half size on the sensor. This is the number you want to focus on, not the closest range from lens to subject. And you probably want a macro lens in the 60-100mm range to get some working distance to your subject.
Seriously consider buying used. Older models will do fine and are generally built in a really good quality - mechanically and optically. And don't worry about auto focus and automation. Most of your focusing and exposure will be done manually when doing macro.
One real downside to macros is the price.
As an alternative you can buy magnification lenses that screw into the front for your regular lens. They do a very good job at a fraction of the cost of a macro lens.
Extension tubes that move a normal lens or a zoom away from the camera work well too, and can be bought for reasonable prices. In combination with a macro lens you can get extremely close with extension tubes.
You can also consider a reverse ring, that screws into the front of a lens and enables you to mount it backwards, which will give a very high magnification for some lenses, but can be hard to control.
A last option is a set of bellows, but they are both rare and expensive and will usually give you much more magnification than you need for fly photography.


Tripods and support
You will need either a tripod or some other form of support for your camera. A sand or bean bag can do and a table top tripod will work for the smaller camera, but if you want real flexibility and stability, you will need a "real" tripod, and preferably one that allows for lots of movement in different directions.
Since the camera needs to go close to the fly - often within a few centimeters/inches, you might find that standard tripods simply can't get close enough. A movable center column, individually movable legs and an overall high degree of adjustability is the key.
And don't go cheap! A good tripod can easily cost what a camera costs, and a really good one is even more expensive.
Consider alternatives: a bean bag or a sand bag, a simple ballhead on a board, a clamp or some other simple solution. You have a lot of options for compact cameras.
What you want is a way of keeping the camera fixed in one position while you arrange the subject and keeping it steady while you expose.
Flash and lamps
You will need light. Depending on your mood, needs and level of ambitions, you can do with everything from daylight through a window over a single lamp to elaborate setups with several lamps or flashes.
Personally I vary my style and my light quite a lot, but if you see fly images like Dutch Hans Weilenmann's, you can see how he emphasizes consistency and works with the same background and the same set of lamps. Hans calls his setup a "Mickey Mouse" setup. It's basically a clip for the fly, a blue background and a couple of cheap lamps, which just serves to show that nothing elaborate or high end is necessary if you offer it some attention and get it tuned in as Hans has done. To reach his level of uniformity isn't trivial, but it's certainly possible as can be seen from Hans' colossal collection of fly pictures.


These days I personally use either daylight or a flash, sometimes more flashes and oftentimes combined.
And when I talk flash, I mean flashes separate from the camera. Built-in flashes can be used in a pinch (see later), but it's much better with a separate flash. If you don't have or want to buy a separate flash, use normal lamps in stead. Cheap halogen lamps will bring you very far (see later).

Diffusers and reflectors
Whether you use flashes or lamps you will need to diffuse the light. This will get rid of hard shadows. We don't want hard shadows! Diffusion is obtained by making the light source larger. Use large lamps like florescent tube lamps - elongated or round - or large reflector office lights. Alternatively you can diffuse the light by placing a large milky white but still translucent layer between the lamps and the subject.
Even daylight needs diffusion sometimes. It might be overcast, which is God's way of making perfectly diffused light, but shooting in direct sunlight works best when you let the light shine through something. Most thin white materials will work: paper, fiber cloth, white fabric, a white plastic bag or diffuser panels made for the purpose.
Along with diffusion you can also use reflection to soften up shadows. Everything from simple white sheets of printer paper over aluminum foil to mirrors and reflector panels made for the purpose will work. A couple of simple reflectors do wonders and can oftentimes replace a lamp or two.
I have bought a fairly inexpensive 4-in-1 (gold/silver/black/white-transparent) Lastolite diffuser/reflector that does wonders and packs down to a small package when not in use and is available in many sizes at quite reasonable prices.


Light box or light tent
A simple way of obtaining soft light is to use a light box or a so called light tent. This is essentially a box with translucent sides, which your light shines through. It softens the light and reflects it to create the most fantastic delicate light.
You can buy tents built for the purpose. They are neat, oftentimes collapsible and of course work perfectly, but they are also expensive.
My own first light box was made from a cardboard box and some tissue (sewing pattern paper that I "borrowed" from my wife). I cut out top and sides and taped on two layers of tissue and put a large piece of white paper inside for a background. It worked like a charm, but was a bit fragile. These days I use a large plastic bedroller storage box, which is made from milky, white plastic and does the same as any light box: diffuses the light. I tape paper inside for a background and shine a single flash or lamp through the top at an angle. Sometimes I use two flashes or lamps, but usually one is sufficient if it's placed the right way.


Setups and backgrounds

I've done a lot of experimenting with backgrounds. My own personal opinion is that they should be fairly uniform, but not too much. I like some variation, some structure, but little enough to keep the fly isolated in the foreground. The key to good background isolation is distance, which can be difficult to obtain in small setups like light boxes and on table tops.
Many fly photographers use totally uniform backgrounds, and blue, red and green seem to be favorite colors. These work very well for isolating the fly, but I personally find them a little boring, and rarely becoming for the flies. But if your aim is an objective registration of the flies, it can be a good choice. In the case of using uniform background I personally often use a neutral gray or a pure white, which enables me to fully isolate the fly from the background. I have a whole selection of cheap, mat cardboard in a broad range of colors that I sometimes use. You can buy packages of nice large sheets in a variety of colors in almost any office supply shop or craft store. You can fiddle with different background materials here or fiddle with different background colors here.


The background effect
The background does make a big difference on the impression of the fly and can add clarity, tension, color, dynamics and really make an impact.


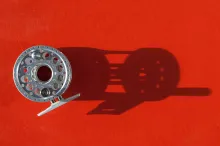
Holding the fly
You will need some way to hold your fly while shooting it. The easy way is simply to lay it on a flat surface, but that usually has a few unwanted effects:
1) the fly tends to become a bit squashed - depending on its construction, but hackles and wings will typically become a bit flattened on the underside.
2) It can be difficult to arrange the fly in a suitable position. It tends to roll, and lay whichever way it wants to, which is not as you want it.
3) Having the fly close to the surface will give you shadows unless you do a really good job with the light.
So you want the fly stuck into something.
Using your fingers is the easy way, but it makes it difficult to keep the fly in a fixed position, and handling fly and camera at the same time can be cumbersome.
Sticking into wood or some other material can do the trick. I have pieces of driftwood, bark, dowels, scraps and such lying in a box for the purpose. It's easy to use and looks good. Gently poke the hook point into the wood, and arrange the fly to a good angle and it will sit there while you shoot it.
The vice is an obvious place to keep the fly while shooting, but there are other more discrete tools. Electronics clips are a good alternative. They fill less in the picture and do a good job of fixing the fly. A pair of fine tweezers and a rubber band is even more discrete. Use a clamp or some clay or play dough to hold the tweezers and grab the bend of the hook with its tip.
If you are shooting large flies with a lot of soft material, it might work better with the fly hanging from the hook eye. A piece of fine tippet tied to the eye and you can tie it or tape it to something over the background. Set the light "sideways" so that the illusion is a fly lit from above, and turn the image 90 degrees once you edit it. If the string is visible, use your photo-editing program to retouch it.
Tube flies can be shot with a tube needle sticking into the front of the fly, and can be retouched in a similar way.
The floating fly
Some larger flies can be difficult to get to act correctly when they are held in a clip or a vice. Hang the fly vertically and light it from the side in stead of the top. Then turn it and remove the string and viola! You have a freely suspended fly.


Exposure and depth-of-field

One thing you will notice when you start going close to your subject is that the depth-of-field (DOF) becomes very small. The DOF is the part of your image, which is in focus. For normal shots on normal distances, the DOF will usually be several meters or dozens of feet and go from say a person in the foreground all the way to the horizon.
But when you go close, this changes dramatically, and the DOF can be reduced to millimeters or a fraction of an inch and become so narrow that not even a small fly will be in focus from edge to edge.
Smaller cameras with smaller sensors have a larger DOF at close-up distances, while SLR-cameras have shallow DOF due to the physics of the optics and the size of the sensor.
In both cases the sharp area can be increased by stopping down, meaning increasing the aperture or f-stop. You will need to do this manually by setting your camera to aperture priority and dialing it down to f/8, f/11 or even f/22 or whatever your lens and camera allows. Not all cameras allow this control, in which case you can trick the camera to doing it anyway by using lot of light. Lots! You can usually see on the display on the camera what shutter speed and f-stop it uses. The higher the f-stop, the better.
Stopping down will make the image sharper over a larger distance, but also cut severely on the light the lens lets in, hence requiring a lot more light - actually twice the amount of light for each full stop you dial down. That again leads to the need of a flash or a very steady tripod that can hold the camera still during the long exposure you need as a result. You will have to experiment with the options on your camera and your setup, but if you can't get the flies fully in focus, it's the aperture you need to play with. You can also play with manual focus. Some P&S cameras allow this, and it enables you to override the autofocus, which sometimes seems to focus as it pleases.
Varying views
Consider shooting the fly or flies in different constellations than just directly from the side. Variation can add new impressions and when the images are used in an article they can add some dynamic to the visual side.


Long exposures
When shooting at long exposure times like 1/30th or 1/15th of a second or longer, you will start risking shake in your images - even when it's on a tripod or on a sturdy surface.
To overcome this you can use the self timer that most cameras have. Set it to 10 seconds, and press the shutter. The camera will then become steady after your touch and the shutter will release after the set interval.
A remote trigger does the same, leaving the camera untouched at the moment of exposure, and if your camera can use one, I can warmly recommend getting one.
More advanced cameras like semi-pro SLR's have all kinds of mechanisms to prevent shake, from quiet shutter modes, to mirror-up functions that all make the camera stay absolutely still while exposing. Check what your own camera can, and use these functions when available.
Using a flash will eliminate all these problems, since the flash duration usually is so short that it rules out all camera shake.
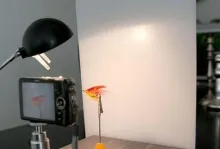
Makeshift setups
My personal favorite way of shooting flies is the improvised makeshift setup, where I find a location or a background - in the house, on the balcony, in the garden or anywhere where I can create a temporary mini studio for shooting a single fly or a series of flies. I haven't got the patience or the room to have a permanent setup for taking consistent pictures and I like the variation.
I use all kinds of environments - shelves, window sills, tables, blocks of wood, bark, tiles, glass, books, maps, plants or whatever comes to mind. When doing this I very often use daylight as my main source of light, but often supplement with a diffuser, a flash or a reflector or two.
I almost always use a tripod, but sometimes I simply take the fly, stick it in different places, focus a hand-held camera and shoot. It can be difficult to get the focus right and long exposure times sometimes prohibit this method, but if I shoot a handful of images, I usually get one or two useful shots. With some calm breathing and a firm grip on the camera, I can muster sharp image down to 1/30th of a second and sometimes even 1/15th.


Setting up lamps
When setting up your light, you want to arrange it to get as natural as possible, showing the details you want to show and at the same time not giving too bright highlights or too dark shadows.
Making a single lamp arrangement that does equally well for all sizes, colors and textures of flies is almost impossible, but following some general rules makes your results if not consistent then at least controllable.
You can work with one or more lamps. The more you have, the easier. I recommend getting hold of three cheap halogen or LED lamps with bright, neutral light. These can be had for next to nothing in most home supply shops, and places like IKEA or Home Depot has them in all kinds of shapes and sizes at very nice prices. Get work lamp style lamps and a type with a flexible lamp arm that enables you to arrange the lamp as you please. You can get lamps with heavy bases for placing on flat surfaces, but lamps with clamp feet can be a good alternative.
Select one lamp to be your main light. This will typically go over the top of the fly to the side where the hook eye is. Diffuse it with some paper, plastic, tissue or a sheet of fiber mat. I have used glass fiber wallpaper, and that works like a charm, and has the advantage of not being affected by the heat from hot lamps. Use plain wooden clothes pins to attach it to the lamp or to something between the lamp and the fly in a good distance like 20-30 centimeters or ½-1 foot. That will give you some nice, soft light. If you use a light box or tent you don't need the diffuser.
Set a second lamp to the other side, lower and further away (to dampen its power). This lamp will soften shadows. The same effect can almost be obtained with a reflector. The shinier, the more reflected light. For fluffy and translucent flies, you can consider a backlight behind the fly but out of vision for the camera. This will shine through the fly and reveal its translucency.
Alternatively consider shining a lamp on the background behind the fly, maybe even without a diffuser to give some variation to the backdrop. This is a nice way of creating a bit of dynamic.


Be careful that no light from any lamp spills directly into the camera lens. This will give some nasty stray light. Simply use some black cardboard to shade the lamps, avoiding the direct light.
Experiment with lamp and reflector placement, and find a setup that becomes you and your flies. Once its in place, your can probably shoot a bunch pictures without changing anything.
Color temperature
If you want to get really great fly pictures when using lamps you will need to play with color temperature settings on your camera. Almost all cameras have settings for different light sources. Find that menu or dial and see what it can do. Usually it has an auto setting that lets the camera decide, but if you can, overrule it and set it to tungsten when using lamps. That will remove the reddish hue that tends to come from these lamps and make things look much more natural. Some cameras even allows you to measure the color of the light and set the camera accordingly. Use a neutral gray sheet of paper to measure against. The camera manual has a guide if the camera has this function.
The reason why color temperature is interesting, is that it enables you to remove the effect of colored light and get a more neutral rendition of your fly's colors.


Selecting flashes
If you want to "go big" and more professional and gain even more control, you can venture into flash photography AKA strobism (small flashes are often called strobes by pros).
This is swimming into the deep end, and I will not go into detail about setting up flashes or controlling them, but simply list what I use when using flash. I use this type of light for 90% of my fly photos when I'm not using daylight. And even in daylight, I often use a flash to fill in.
Acquiring good flash gear is expensive, and even through you can get far on a budget, you get much further when you dig deeper into the wallet.
I use Nikon SLR gear and have two Nikon SB-800 flashes. These are powerful and very flexible units with excellent integration with Nikon cameras.
I have clamps and lamp stands for both flashes. The stands have booms for added flexibility and I have a selection of diffusers ranging from full size umbrellas to smaller ones, a small soft box, a striplight and a ringflash adapter. I have a number of different reflectors and diffusers ranging from the aforementioned Lastolite to cheap nylon cutting boards from IKEA. I also have a ton of other so called light modifiers, snoots, grids, gels, barn doors, flags and whatnot lending me a lot of variation in the quality of light that I can get from the flashes.
I can control the flashes wirelessly from the camera with a built-in system or through radio units that I bought separately.
Setting up and adjusting all this gear is a long and demanding process, but the control is sublime, and the flexibility almost endless, but consider your needs and your economy carefully before you go out this plank!


Using the built-in flash
Even though the built-in flash found in most cameras - pop-up or not - is inadequate for use as a single light source, it can be useful at times. What you get is a straight on-axis light that can actually work quite well as a fill light in situations where there's shadow on the side of the fly pointing towards you.
But you need to do a few things - one or all of them to get good results.
You will need to tone down the flash. Most cameras have a control - not rarely buried deep in the menu system - that allows you to adjust the power of the flash. Usually it's much too powerful for close-up work, and you need to take it to the lowest possible level.
You can also simply tape a piece of white paper in front of the flash! That will not only reduce power, but also diffuse the light, which we like. Create a small half tube of paper large enough to cover the flash and then some and use some scotch tape to stick it in front of the flash. Be careful not to cover anything else, sensors, the lens or other things on the front of the camera. You can even experiment with color. Pale yellow or orange can add a non-flashy warmer look to the cold light from the flash.
You will also need to make sure that the camera uses slow sync, meaning that it exposes as usual - when the flash is not on - but still fires the flash. This will let the main image be exposed by the ambient light, but fire the flash to brighten the shadows. On normal flash-sync speed the exposure of ambient light will mostly be too low, and the image will be dark, lit by an all too bright flash.


Other subjects
Always consider shooting other aspects of your flies while you're at it. You can show it in connection with tools, materials or simply placed in a context where there's something apart from the fly. It will work well as an added bonus to the more neutral images of the fly, and for use in articles like on this site or in printed magazines or books, such extra pictures are always welcome. They give editors and layouters more to work with and add a welcome variation.
It typically doesn't take much work to pile up the materials for a fly pattern, shoot a bunch of flies together with some tools or get a picture of them drying in an epoxy rotor or a piece of cork. You can also shoot details of the fly. The same light and setup will mostly do fine for detail shots.


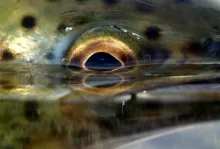
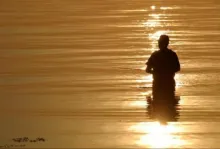
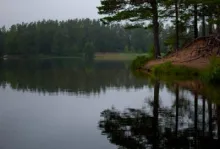
Outdoors photos
One of my favorite ways to see flies is by the water or in action. Not necessarily in the mouth of a fish or even in the water, but on the rod, on a reel, in the hand and with the water or nature as a suitably blurred background. These pictures can very often be shot in the spur of the moment when a nice scene suddenly shows itself. Light, a good looking fly, a nice background or whatever can inspire a picture.
The camera on macro, maybe a fill flash (here the built-in flash will often do), hold up the fly and snap! You can also arrange the fly on stones, logs, pieces of driftwood or whatever offers itself as a nice background. Improvise and experiment.
These images are mostly way better than what the average photographer can do indoors and often tell a nice story as well about ambiance, environment, size and nature of the fly.
When I have tied a fresh fly on my leader, I often routinely take a snapshot of it, just for the archives. Once the fly has been fished and has become wet, it can also be a good idea to snap a shot. Wet flies have a much different appearance than the dry ones, and reveal qualities that can't be seen in the dry fly. On the other hand the wet fly offers less information about how to tie the fly because it often collapses and looks very different than it did when it left the vice.
Simple variation
A simple outdoors shot shows the possibilities. This was shot in a local park, and simply by turning around to get different light and background, I was able to get very different impressions of the same fly.


So, now it's your turn! Go shoot some flies, and once you get some good images, be sure to submit the fly patters to us, and we will be happy to publish your work.


- Digitizing Flies (article)
- Bent Rods (article)
- Better Fishing Pictures (article)
- Fly pictures (article)
- Bring it! (article)
- Casting pictures (article)
- Clear Water (article)
- Fishy pictures (article)
- Gear pictures (article)
- Glorious light (article)
- Go close (article)
- Go low (article)
- Jump! (article)
- Macro (article)
- Perfect Camera (article)
- Pictures of nature (article)
- Shoot the weather (article)
- Underexpose (article)
- Use a fill flash (article)
- Use a tripod (article)
- Waterscapes (article)
- Log in to post comments

Howdy Marrtin,
Th
Howdy Marrtin,
Thanx for this tips. My camera is Olympus E-410, for the pics do I need another SLR lens.
Wim
Martin
What a bri
Martin
What a brilliant article!
Definetely not to technical and tons of usefull info.
best Heiko